
Editor’s Note: The mention of commercial devices in this article is not meant to either endorse or discourage the use of any particular company’s products.
Recently I was prepping our turkey for the oven. I found myself appreciating how elastic and strong turkey skin was and how it would make a good platform for suture practice.
Medical training equipment keeps getting better and better, but it also keeps getting more and more expensive. Much research has discussed and supported the role of using increasingly-complicated medical simulators for medical practice. However, in the drive for to develop better simulators, many seem to think that increasing prices also increase skills.
- $230 for a small platform of fake skin to practice sutures?
- $700 for a “Male Multi-Venous IV Training Arm Kit”?
- How about $22,250 for an “Auscultation Manikin”?
What has happened to inexpensive innovation?
Even in a period where we buy $400 billion fighter jets, arguing for enough funds to buy several suturing practice platforms in your unit is likely difficult, if not impossible, and this is not to mention this is the cheapest option for simulator trainers.
Or is it?
Therefore, we here at NGCM are launching a new series of articles directed at finding cheaper (and tastier) training aids, likely found in your local grocery store, in order to help maximize training for medical practitioners at all levels, whether it is the new medic or the unit surgeon, and not requiring begging your unit for financial support. Let’s be clear: while these high-priced models can be effective training aids, and do have their place in medical training, most military and civilian units are likely unable (or unwilling) to make them a purchasing priority when financial resources are tight.
The main message we are trying to convey here is:
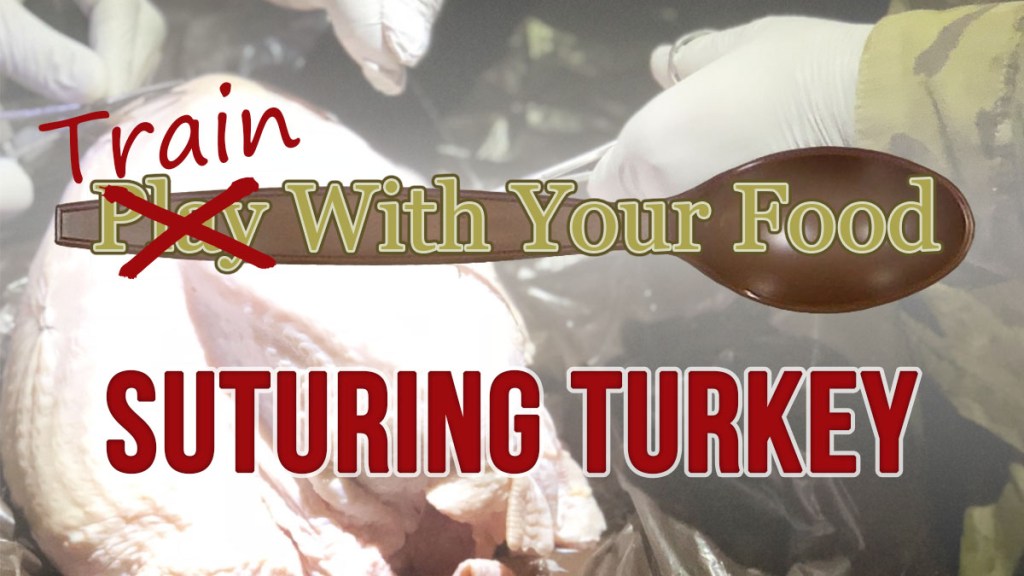
If you are short on resources, go play TRAIN with your food.
Everyday food items can have significant value in medical simulation training. Your grocery store or local butcher/deli are ripe for the picking, with tremendous resources that can help improve both your proficiency and those around you.
And the best part? No government or company purchase card required.
So, with that being said, here is the first part of the series.
Trash Turkey Suture Practice
What was interesting, in my initial search for any prior literature on the use of turkeys (or at least their skin), I couldn’t really find much. I did find a good review of a Chicken-Skin Bench Model, but there was very little on a turkey models.
If you’ve never looked or noticed it before, turkey skin provides a good amount of elasticity, firmness, moisture, and other similar characteristics to that of humans. In “Anatomy and Physiology of Farm Animals”, the author’s remark how the skin of poultry, including turkeys, “is similar to mammalian skin in that it is an organ composed of overlying stratified squamous epithelium and the underlying vascular dermis.” Significant differences to note are that turkey (and all poultry) skin is very thin, easily separates from subdermal tissue, and lacks some human skin structures, such as sweat glands.
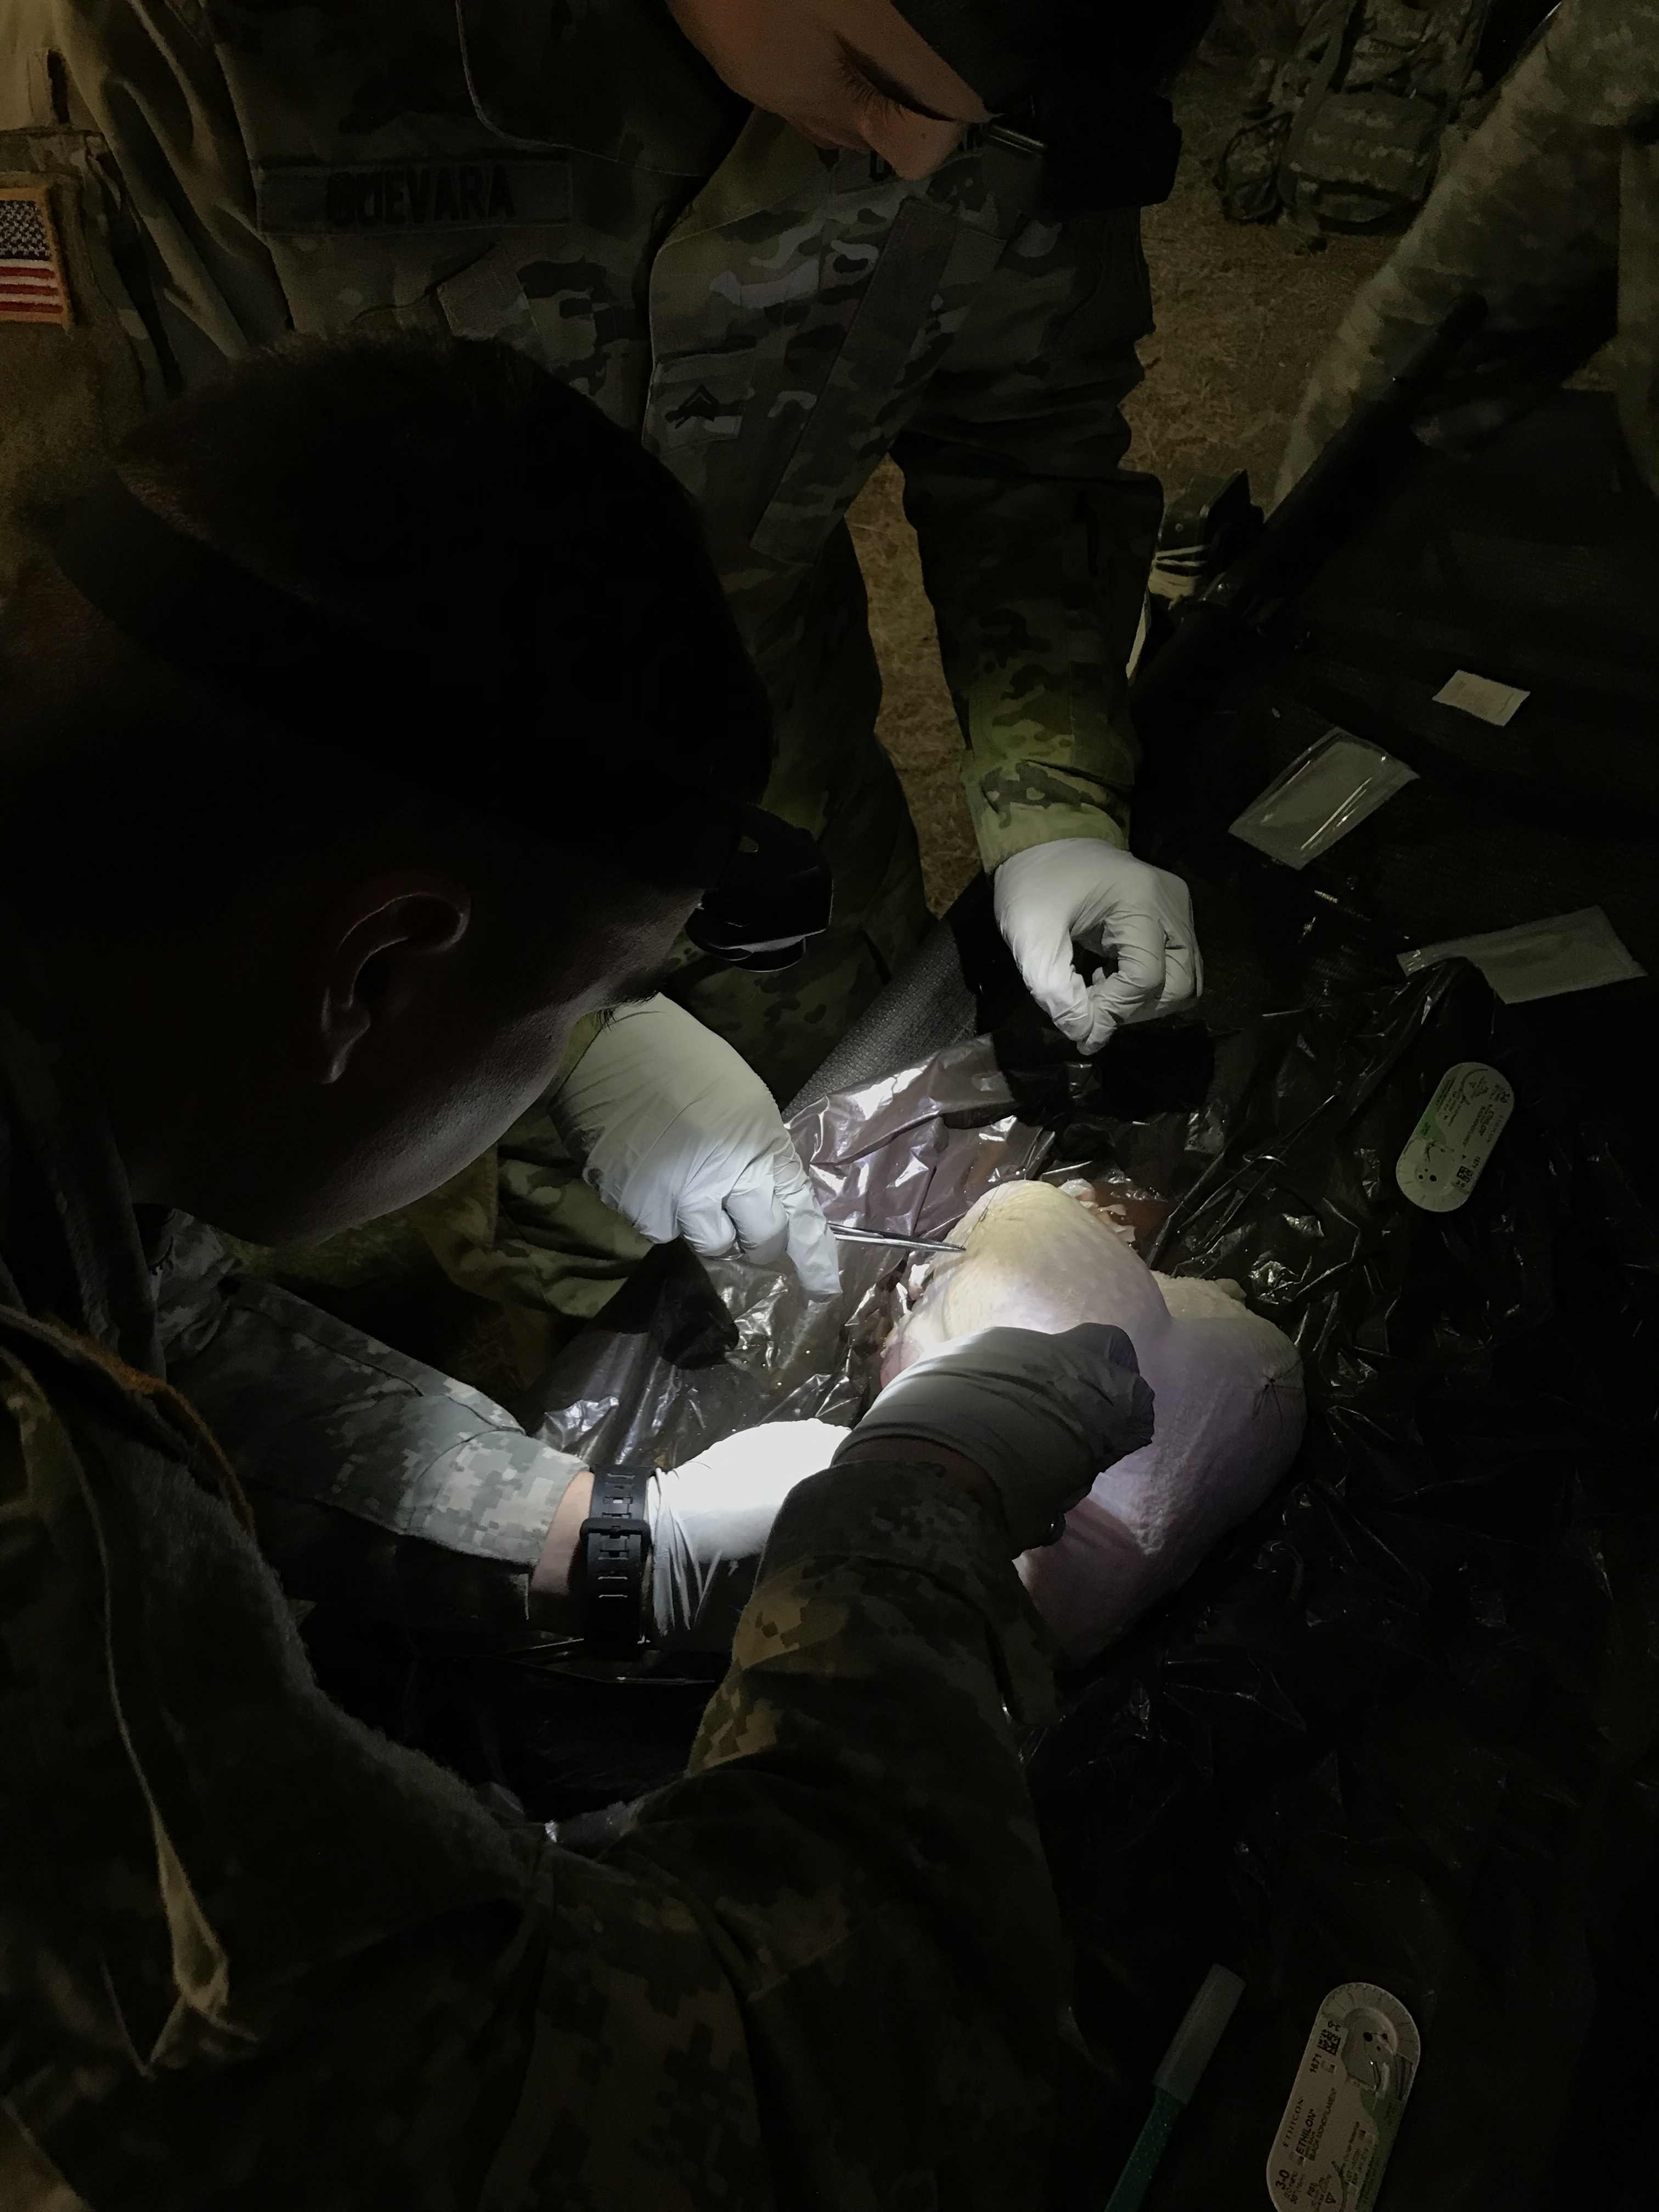
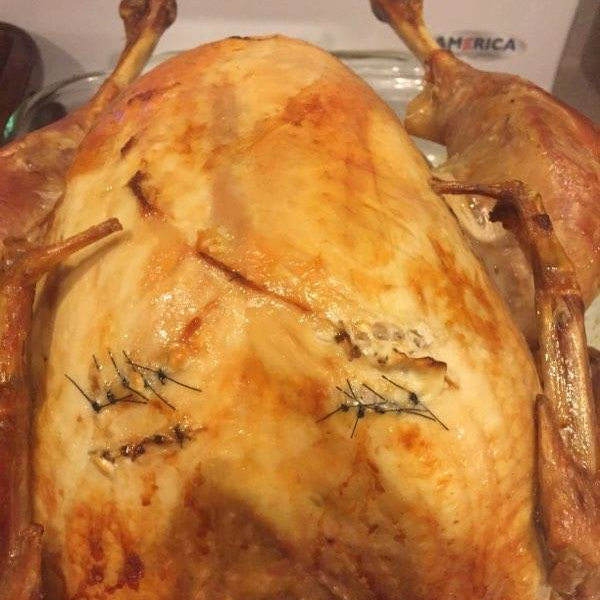
Regardless, at $1.49/lb ($1.39/lb with my 10-cent off coupon!), I secured two 10lb. turkeys for about $30, and they took them out to the field for some hands-on suture training. Unfortunately, my trust in our field kitchen crew to properly care for our refrigerated birds was misplaced, and despite their many promises, they threw them out. However, our two turkeys were saved when one of our brave medics dove right in and fished them out (hence the “Trash Turkey” name).
This was the first hands-on suture lab with my unit, so we kept it simple and focused on orientation, exposure, and getting comfortable with the instruments, with the intent to refine over the course of several iterations. Think of it as coming out of the crawl and into the walk phase.
Ingredients
Ingredients you will need for this training:
- Turkey(s) – more than one is preferential, but each turkey can facilitate two people suturing at once, so two or three is probably enough to have good supervision during classes. We used two 10lb birds for our training, but you’ll want to make sure you have about a pound per person if you’re going to feed people afterwards.
- Sutures – Ethilon and Prolene are likely what you’ll most often have access to, but it is likely site-dependent; I would recommend going for larger sizes (3-0, 4-0), as this is better for familiarization training such as this
- Needle-drivers – any set of hemostats may do in a pinch, but quality needle drivers cannot be underestimated.
- Pick-ups – again, while any tweezers may do in a pinch (pun) you’ll want a set of pick-ups to accurately control the skin.
- Iris scissors – although trauma shears can do if you’re short on supplies
- Scalpels – or a sharp knife to make the initial lacerations
- Optional – any of the above alternatives to facilitate “instrument appreciation”


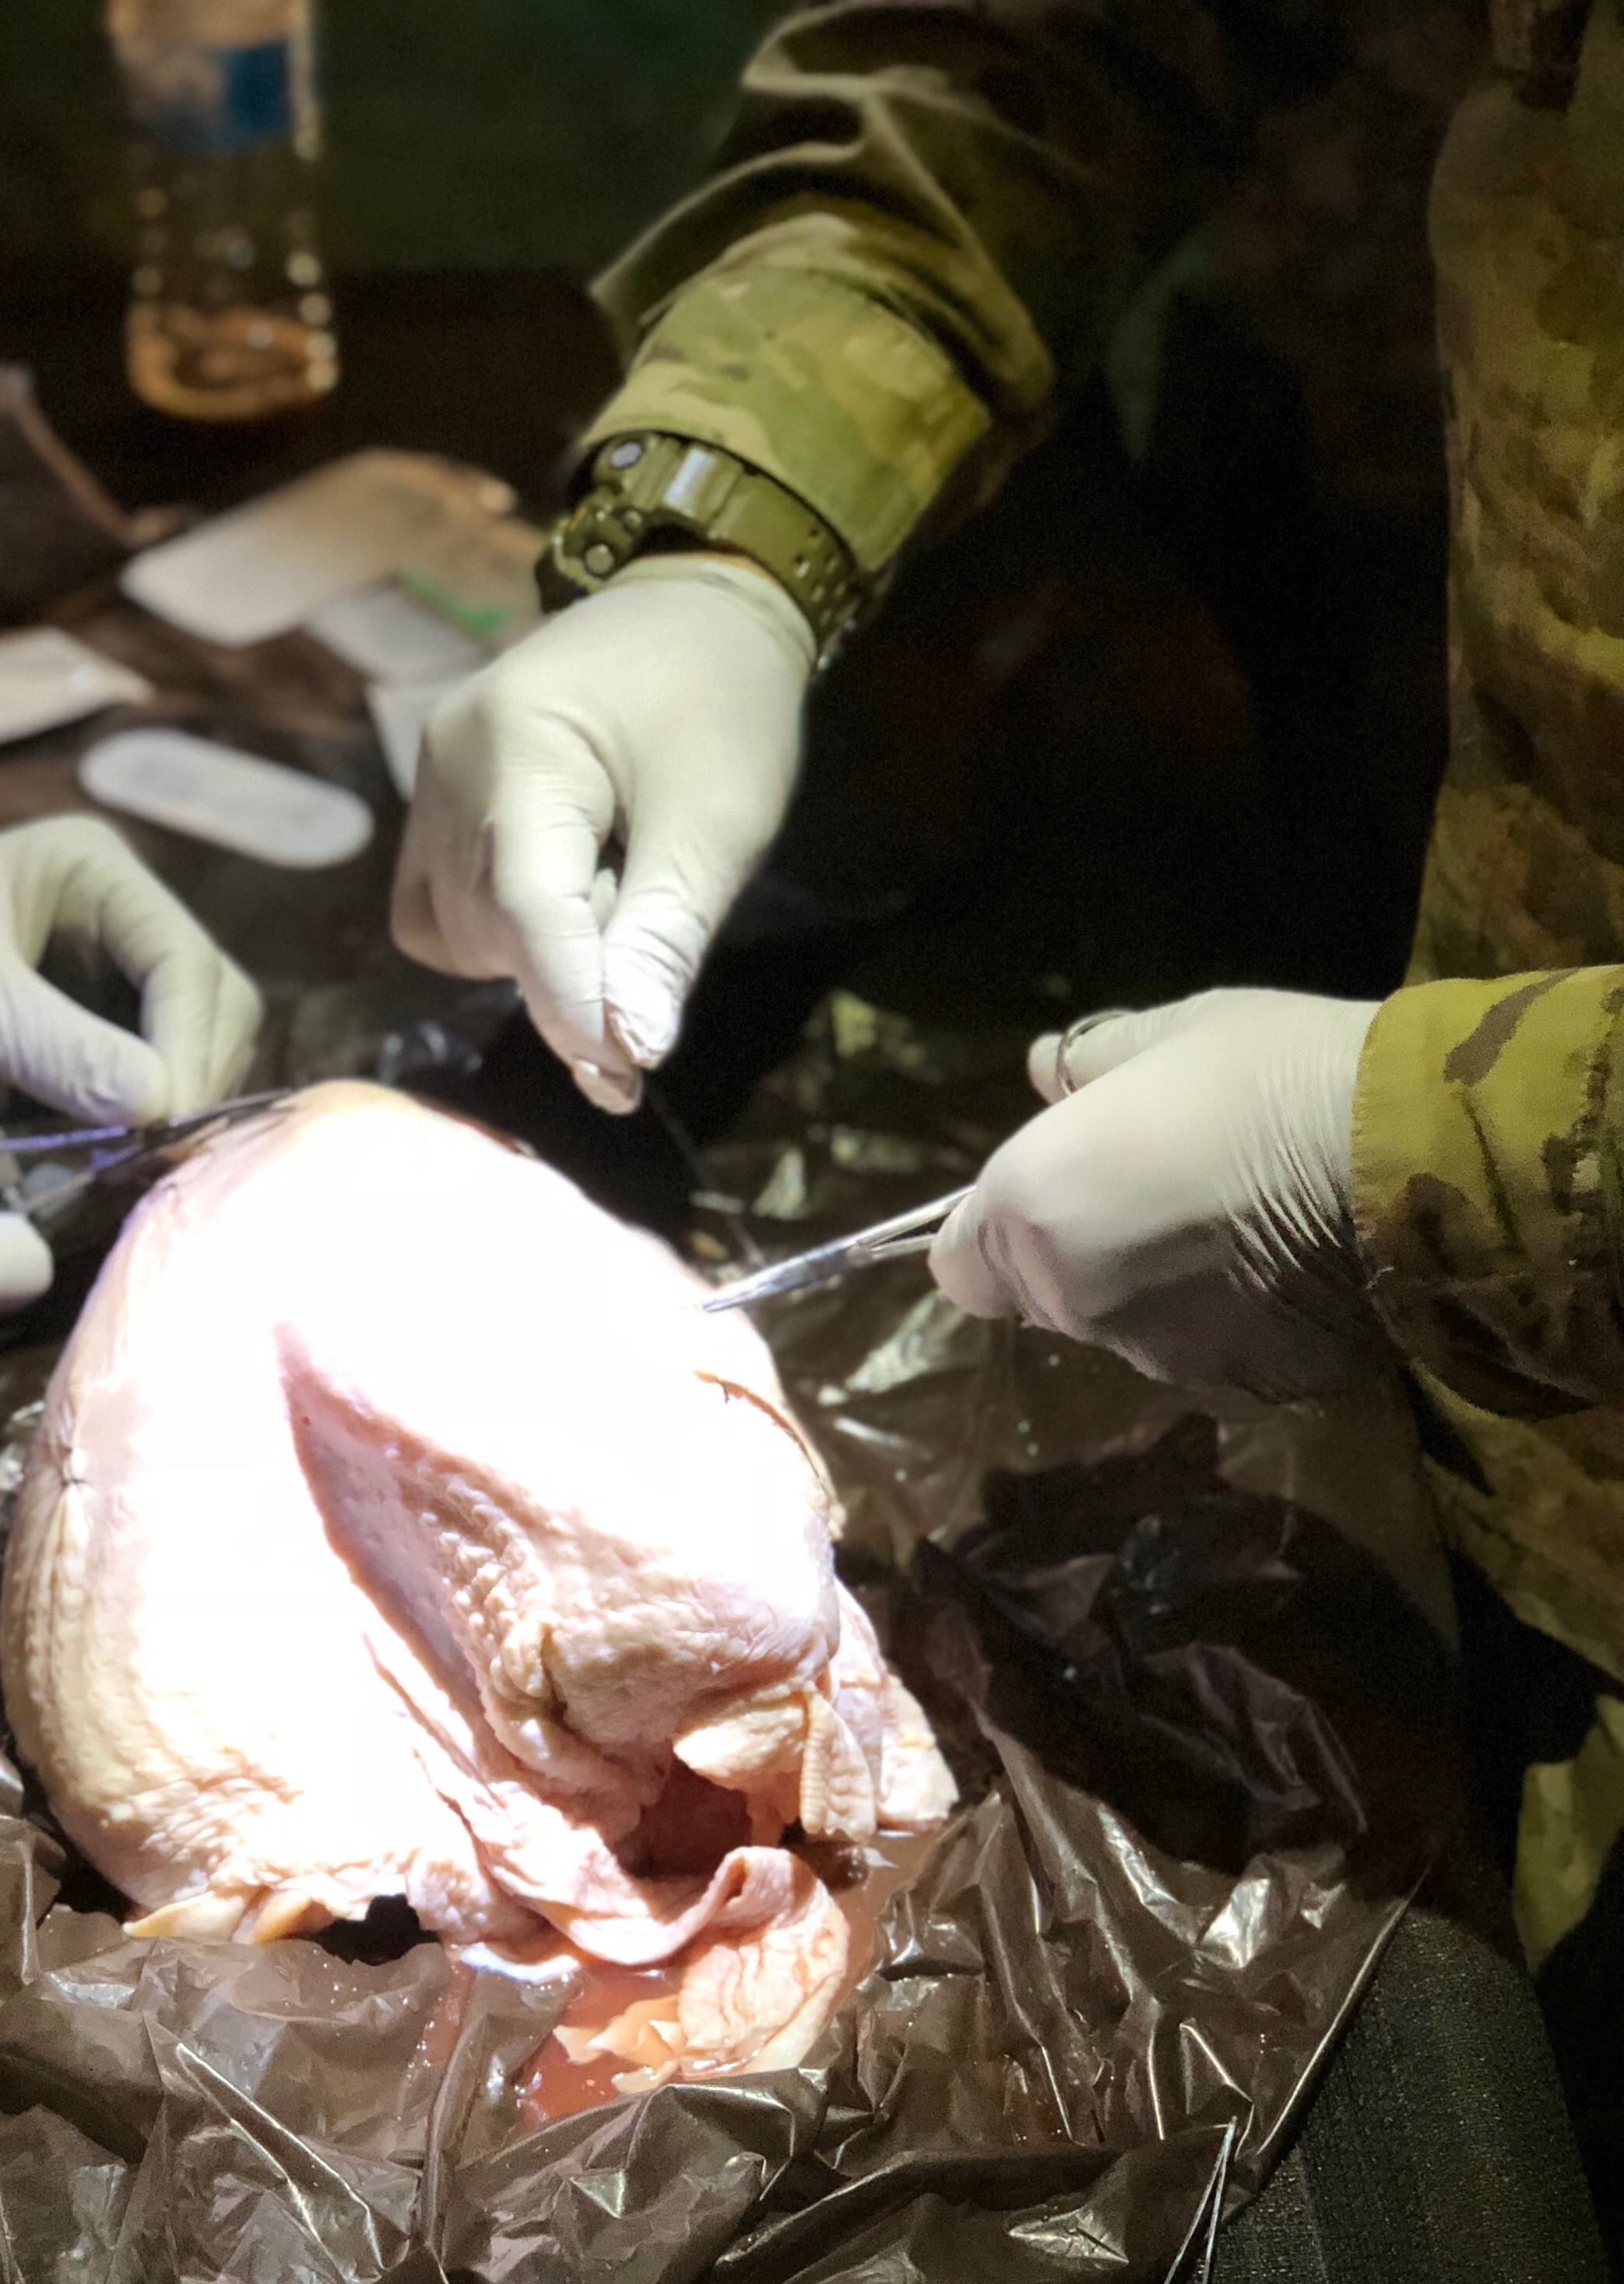
First, a block of instruction was given on some basic characteristics of suture material (Ethilon, Prolene, Chromic Gut, Vicryl) and indications for each, as well as an introduction to knot-tying techniques. Then, multiple 3-4cm linear lacerations were made with a #11 blade scalpel on both sides of each turkey (allowing 4 individuals to practice at one time), and medics took turns with approximating the tissue using instruments, driving the needle, tying the knot, and assisting others.
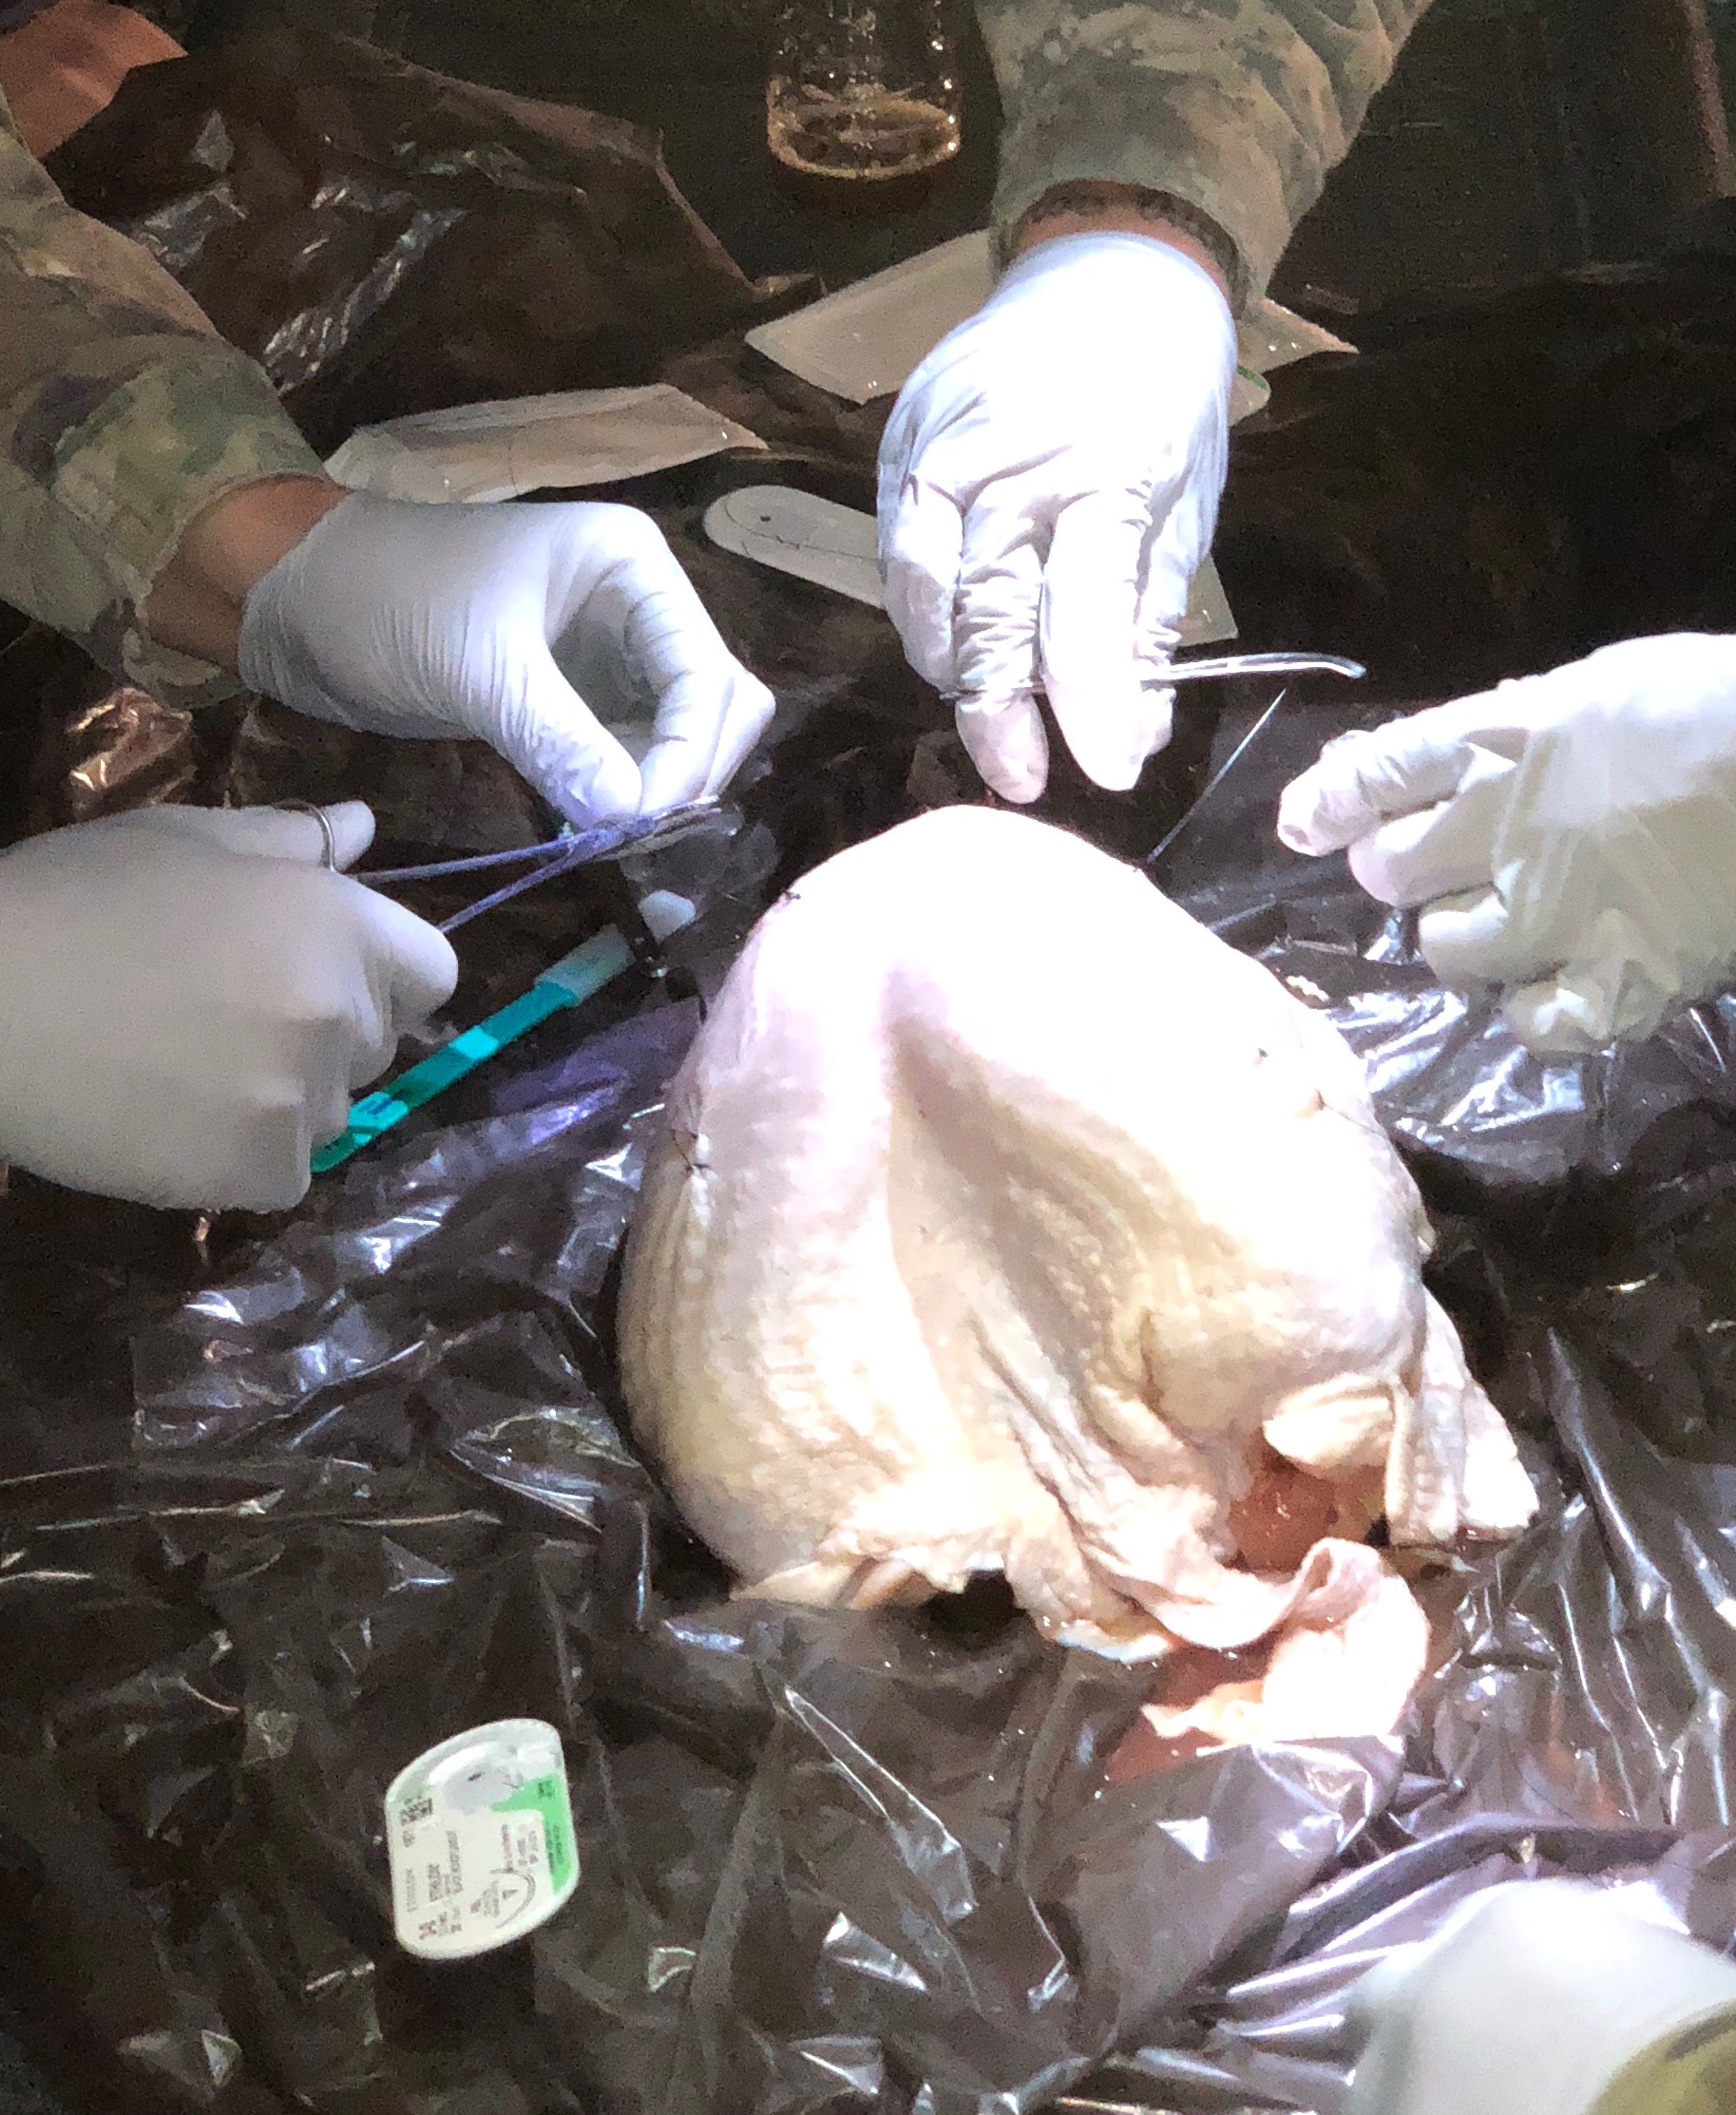
Instruments were easy to acquire given there are always leftover instruments from the various packaged procedure kits found in clinics and units.
Drill Cookbook
Add realism by doing the following:
- Local Anesthetic with notional anesthetic integrated with the lab. Medics can practice local lidocaine injections with good technique prior to suturing, just as would be expected before most laceration repairs. DO NOT eat the turkey if you are injecting any actual anesthetic. Instead, use normal saline or sterile water vials with training labels applied if post-suture ingestion and digestion is planned.
- Realistic Conditions can be created by placing the turkeys on litter stands under low lighting, having medics use headlamps to help provide better focus and overall experience.
- Less Conventional Equipment like curved hemostats and trauma shears, which helped to further reinforce a use-what-you-have mentality when operating in less-than-ideal conditions.
Needless to say, fun and education were had by all.
So, instead of begging your unit to purchase hundreds or thousands of dollars for a “medical simulator” made of plastic, turn to your food instincts. Grab a $15 turkey, slice it up, and get to suturing!
If you are looking for resources on proper suture tying, there are nearly endless sources for techniques to be found online, including these:
- Covidien Surgical Knot Tying Manual (instrument tying starts on page 84)
- Tulane Medical Simulator Instrument Tie Demonstration on YouTube
- Sim Suture Instrument Tie Demonstration on YouTube
Important note: if you are planning to “double-dip” and eat the turkey afterward, don’t follow our cooks’ methods – please allow the turkey to thaw properly. Don’t get sick by ignoring normal cooking instructions for the sake of training!
The views expressed in this article are those of the author and do not reflect the official policy or position of the Department of the Army, the Department of Defense, or the US Government.
References:
Denadai R, Saad-Hossne R, Martinhao Souto LR. Simulation-based cutaneous surgical-skill training on a chicken-skin bench model in a medical undergraduate program. Indian J Dermatol. 2013 May-Jun;58(3):200-207.
Frandson RD, Wilke WL, Fails AD. Anatomy and physiology of farm animals. Ames, IA: Wiley Blackwell; 2013. 464.
Kunkler K. The role of medical simulation: an overview. Int J Med Robot. 2006 Sep;2(3):203-10.

Leave a comment