
As we’ve previously described, medical simulation equipment, while having a place in training, can be expensive and therefore unobtainable for units with a tight budget. Not wanting to deprive medics of good training ideas simply because of money jockeys and fiscal restraints, we here at NGCM continue to scour the literature and the internet, as well as bang our heads against the wall, looking for medical simulation ideas that will you allow you to effectively train for cheap.
The main message we are trying to convey here is:
IF YOU ARE SHORT ON RESOURCES, GO PLAY TRAIN WITH YOUR FOOD.
For this iteration, we will discuss a fairly common medical presentation, especially in the “hypo-hygienic” environment of military field training and deployments: the abscess.
The Abscess: A Brief Explanation and Discussion
Increasing rates of skin and soft tissue infections (SSTI) have been well-documented in the literature (such as here and here). However, a medical provider must readily distinguish between the two most common causes of SSTIs, abscess, and cellulitis, in order to provide appropriate treatment. This is even more important given increasing rates of methicillin-resistant Staphylococcus aureus (MRSA), which usually leads to significant abscess formation in the skin. As with most things in medicine, it is important to be familiar with SSTIs, because the more hands-on time you get with a condition, the easier it becomes to understand, and the more proficient you will become in the proper diagnosis and treatment.
My personal quick-and-dirty explanation for discussing the cause and development of an abscess with patients is this:
Your skin provides a near-constant barrier to foreign materials, such as bacteria/fungi/rocks/bugs/etc, but when there is a break in the skin (caused by a knife wound, a scraped knee, or even simply itching with your fingernails), what’s on the outside can get inside. This can also happen with clogged sweat glands and pores (as anyone who has been through puberty can attest to). Once bacteria get inside, your body responds in several ways as part of a basic inflammatory response. Local cells in the area give off a signal to dilate local vessels, in order to 1) increase blood flow to the area, 2) to allow much-larger white blood cells (WBC), specifically neutrophils, to get to these smaller areas, and 3) to increase local vessel permeability to allow the WBCs to squeeze out of the vessels and into the surrounding tissue where they can attack the bacteria. Some of these neutrophils are kind of like suicide bombers; when they attack, they kill the bacteria, but they also die in the process (in a process called netosis). All of this cellular debris constitutes the lovable, smelly goo that we call pus. So, therefore, as this fight continues, you’ll see an increasingly ‘erythematous’ (reddened) area filled with increasing amounts of ‘purulence’ (pus).
Searching the internet for “giant abscess” will result in many obvious and dramatic abscess pictures that will be easy to recognize and differentiate from other SSTIs like cellulitis. Likewise, searching YouTube for videos will result in the largest, most obvious, and most graphic examples (we know you clicked it). This makes it all the more important to become familiar with a more reasonable abscess model, where the abscess is not as blatantly obvious.


While there are a couple of different approaches to treating an abscess (discussed below), every treatment is centered on one simple, effective procedure: incision and drainage, also known as “I&D”. The goal of I&D is to: a) provide an avenue for all of this purulence and bacteria to drain b) allow for further dilution of remaining bacteria via irrigation, and c) possibly obtain a sample for bacterial culture. At its base, I&D is kind of like popping a very large pimple… but with a scalpel.
Side Note
I have previously been asked: “why not just squeeze it until it pops?” Answer: because when squeezed, an abscess can spread it laterally and inferiorly, and make it worse for the patient. Instead, an I&D provides an easy avenue for the purulence to drain).
Pictured: Definitely NOT the definitive treatment for an abcess! DO NOT squeeze it until it pops! (Picture courtesy of the DailyMailUK)

Recent literature has been conflicted on the use of antibiotics effective against MRSA in conjunction with I&D in high-risk populations. Those at “high risk” include healthcare workers (note: we did not see “healthcare worker” defined in any literature well-enough to definitively state whether or not line medics fall under that category), although most literature agrees that military personnel, in general, are high-risk for MRSA (such as here and here). While most literature, including the Infectious Disease Society of America, supports adjunctive antibiotic therapy for those at high-risk for MRSA, others contend that there is no significant difference in whether or not antibiotics are used. Throughout this, however, one thing is consistent: I&D is the cornerstone of any effective abscess treatment plan.
Therefore, for this article, we are focusing on creating a realistic and inexpensive simulator to increase familiarization with the recognition and treatment of a basic soft tissue abscess.
Prior Abscess Models Found in Literature
Fortunately, in looking to continue the ‘Train With Your Food’ series for NGCM, we don’t have to completely ‘reinvent the wheel’, as there have been multiple published articles on creating abscess models. So, we took it upon ourselves to explore and vet some of these past ideas to help devise the ultimate cheap-yet-effective abscess training model. Below are the articles, links of four models we found, along with our opinions on the pros and cons of each:
| Author (Publishing) | Pros | Cons |
| Warren (2010) | – Use of balloon
– Use of local anesthetic training |
– Does not specify what type of balloon
– Suggests anatomical simulator via www.limbsandthings.com (lowest model is $59) |
| Fitch (2008) | – Use of thin balloon via Word catheter device
– Realistic training model |
– Word catheter may be difficult to obtain (primarily used in OBGYN)
– Realistic training model was a cadaver (logistical difficulties) |
| Augenstein (2016) Journal of Emergency Medicine | – Simulator model using chicken breast and cooked polenta
– Low cost |
– Study focused more on recognition by ultrasound (not always practical as most units don’t have this capability) |
| Heiner (2010} Simulation in Healthcare | – Simulator model using chicken breast
– Use of balloon and catheter technique |
– Use of chicken breast without skin
– Difficulty to create “pockets” within meat to ensure proper depth for realistic simulation – Study focused more on deeper abscess identification via ultrasound (not always practical as most units don’t have this capability) |
Of the four models above, by far the last two were the most viable for reproduction at the unit level (unless you know a guy with some human cadavers lying around). Specifically, Heiner’s model using a chicken breast was pretty inexpensive and fairly easy to reproduce. However, his steps to “tunnel” inside the chicken breast “with care to avoid penetrating the skin on the opposite side” did not seem ideal to us for use with multiple models in large groups of medic training. Similarly, his model appeared to focus more on ultrasound recognition and evaluation, which most units don’t have regular access too, and did not have any actual skin, which we believe is important to help provide realistic training considering an abscess is a type of SSTI, aka a ‘SKIN and soft tissue infection’. Therefore, for ease-of-use with multiple repetitions given larger units and condensed timelines, and to maintain that realistic skin feel, we adjusted Heiner’s chicken model to tuck a pus-filled water balloon into chicken thighs with skin.
Ingredients
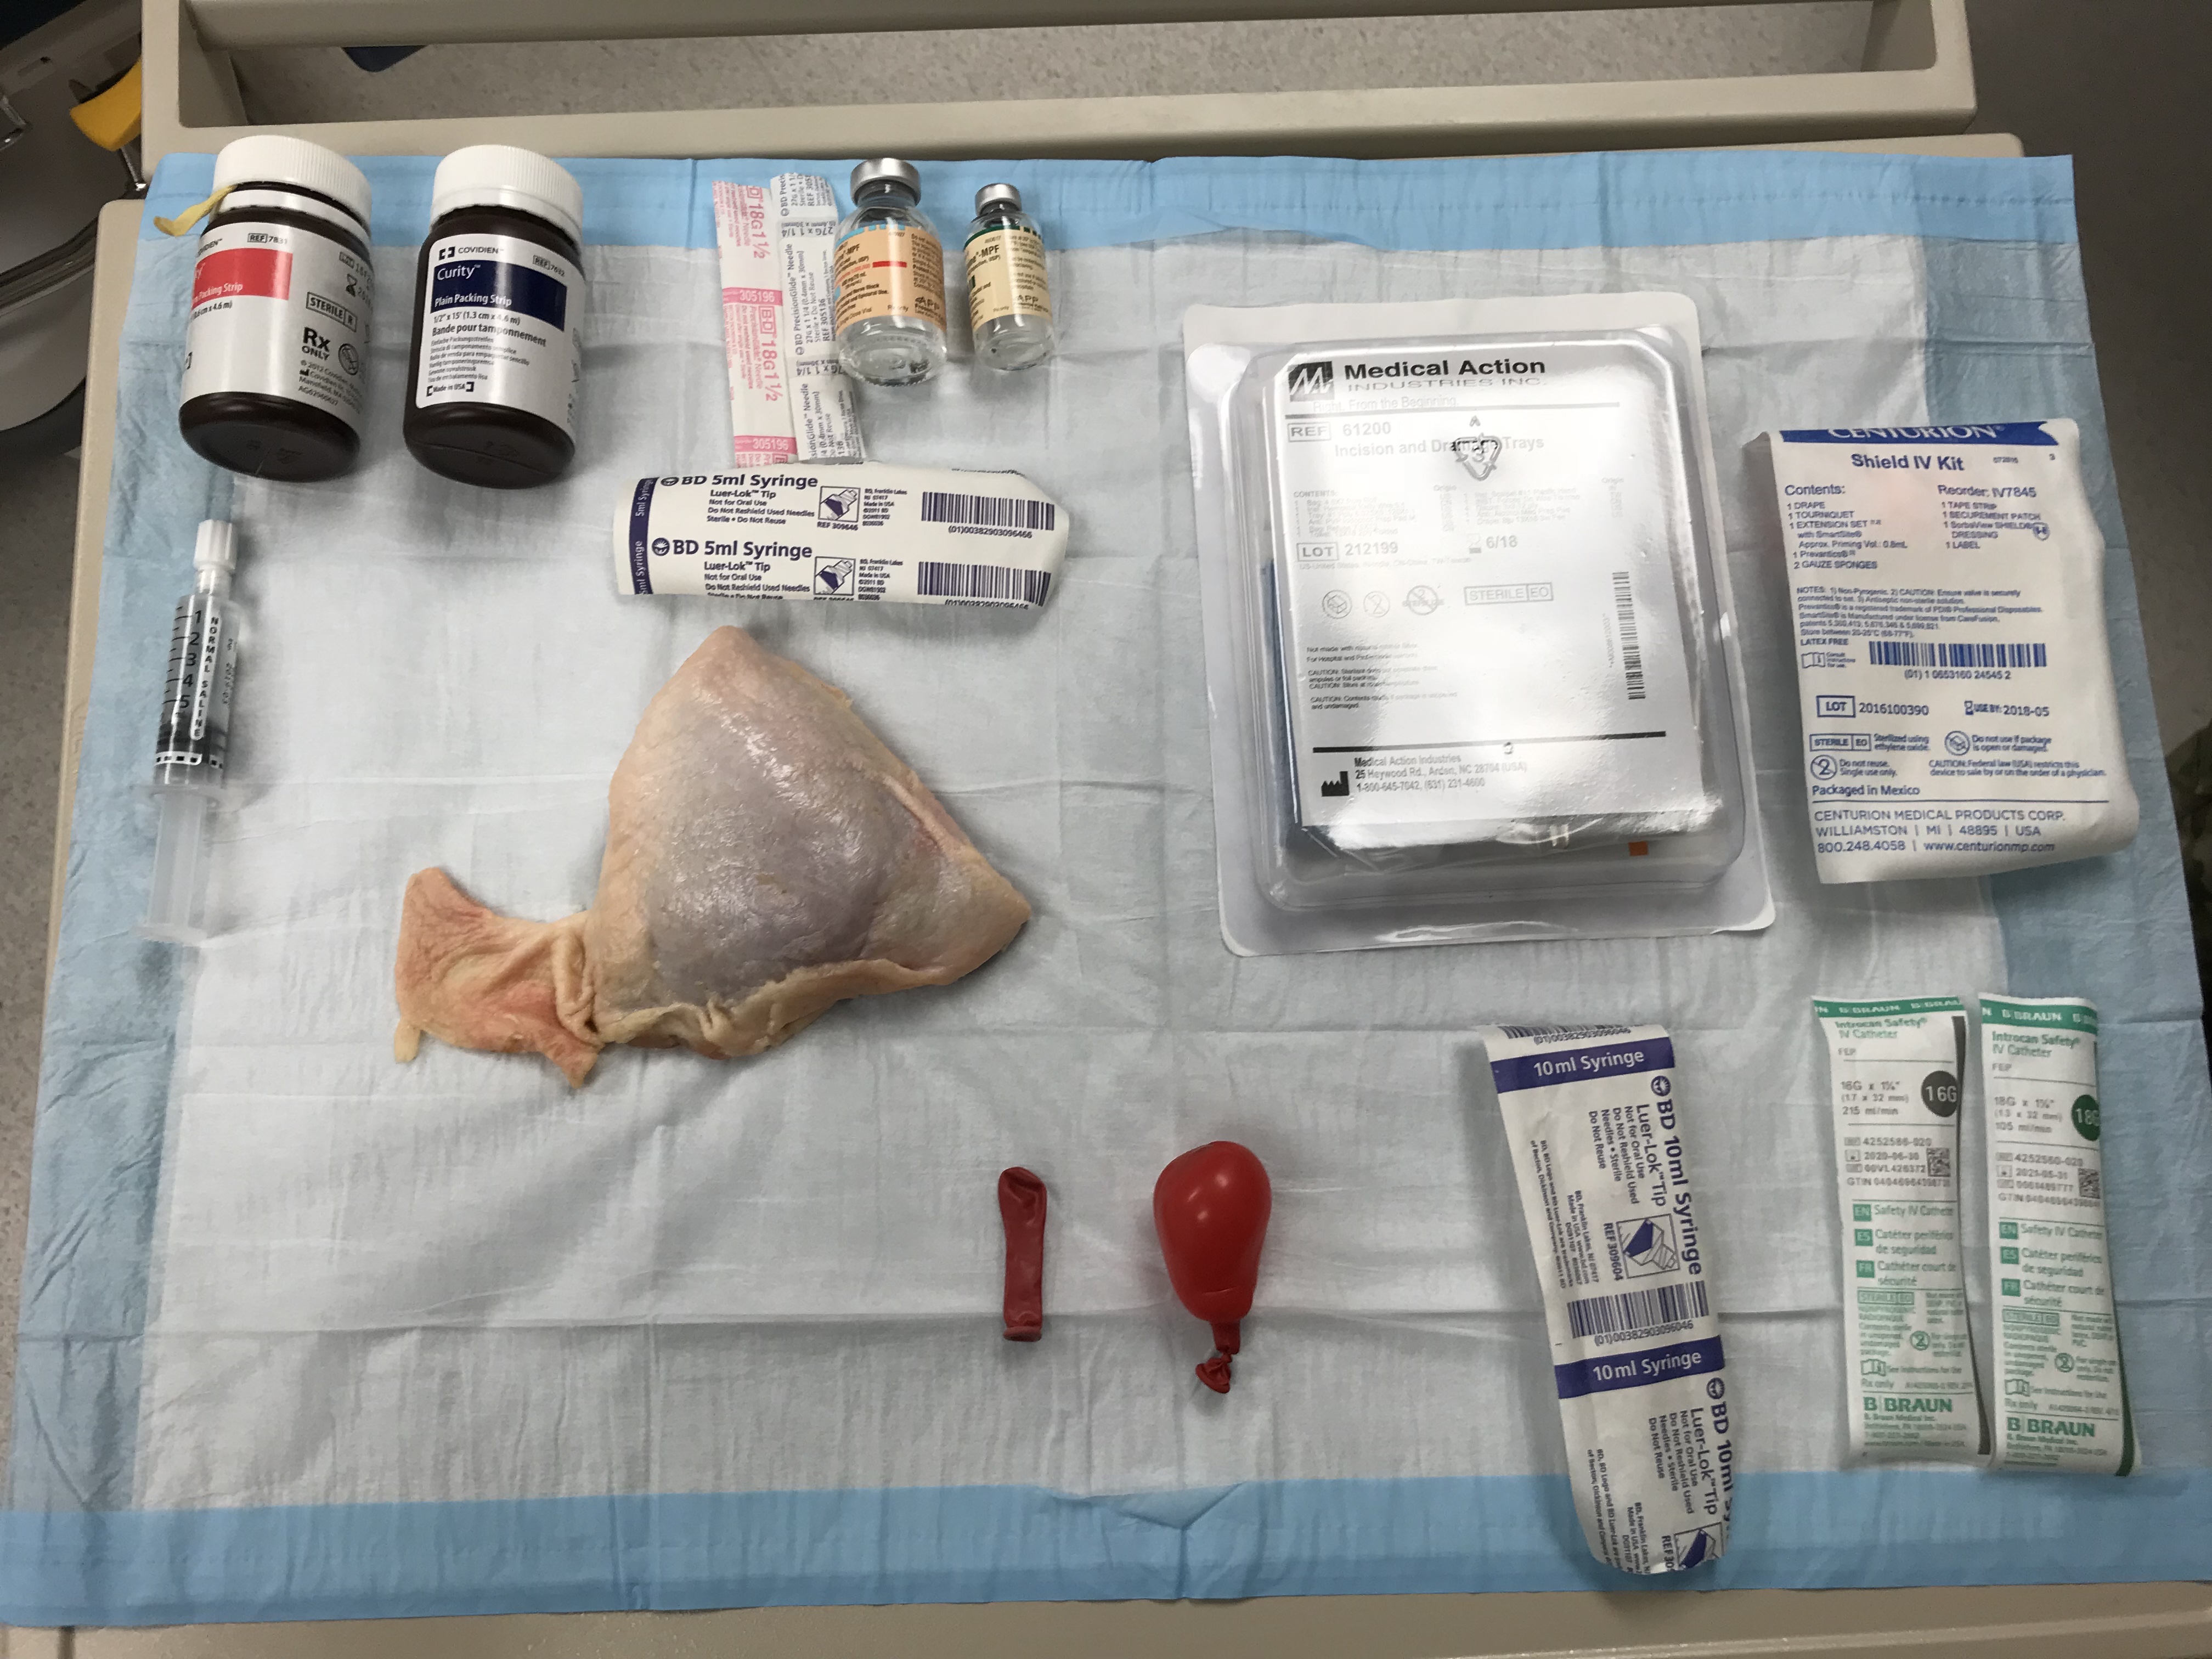
Ingredients you will need for this training:
- Chicken Thigh(s), one pack – you can usually buy these in packs of 4-6 for less than $10, and each thigh can facilitate multiple attempts.
- Water Balloons, one pack – “balloons” were mentioned throughout the literature, but never specified as “water balloons.” As noted above, Fitch, et al. used a Word Catheter, which has a similarly thin balloon wall, but is likely difficult to acquire if you’re not in an OBGYN clinic. Regular party-style balloons have a thicker layer of material, which are less realistic for a fluctuant feel, and require a larger amount of air/fluid to inflate. Instead, use smaller, thinner water balloons to get the job done. (Pro Tip: using red water balloons helps to enhance visualization, with increased erythema/redness at the site).
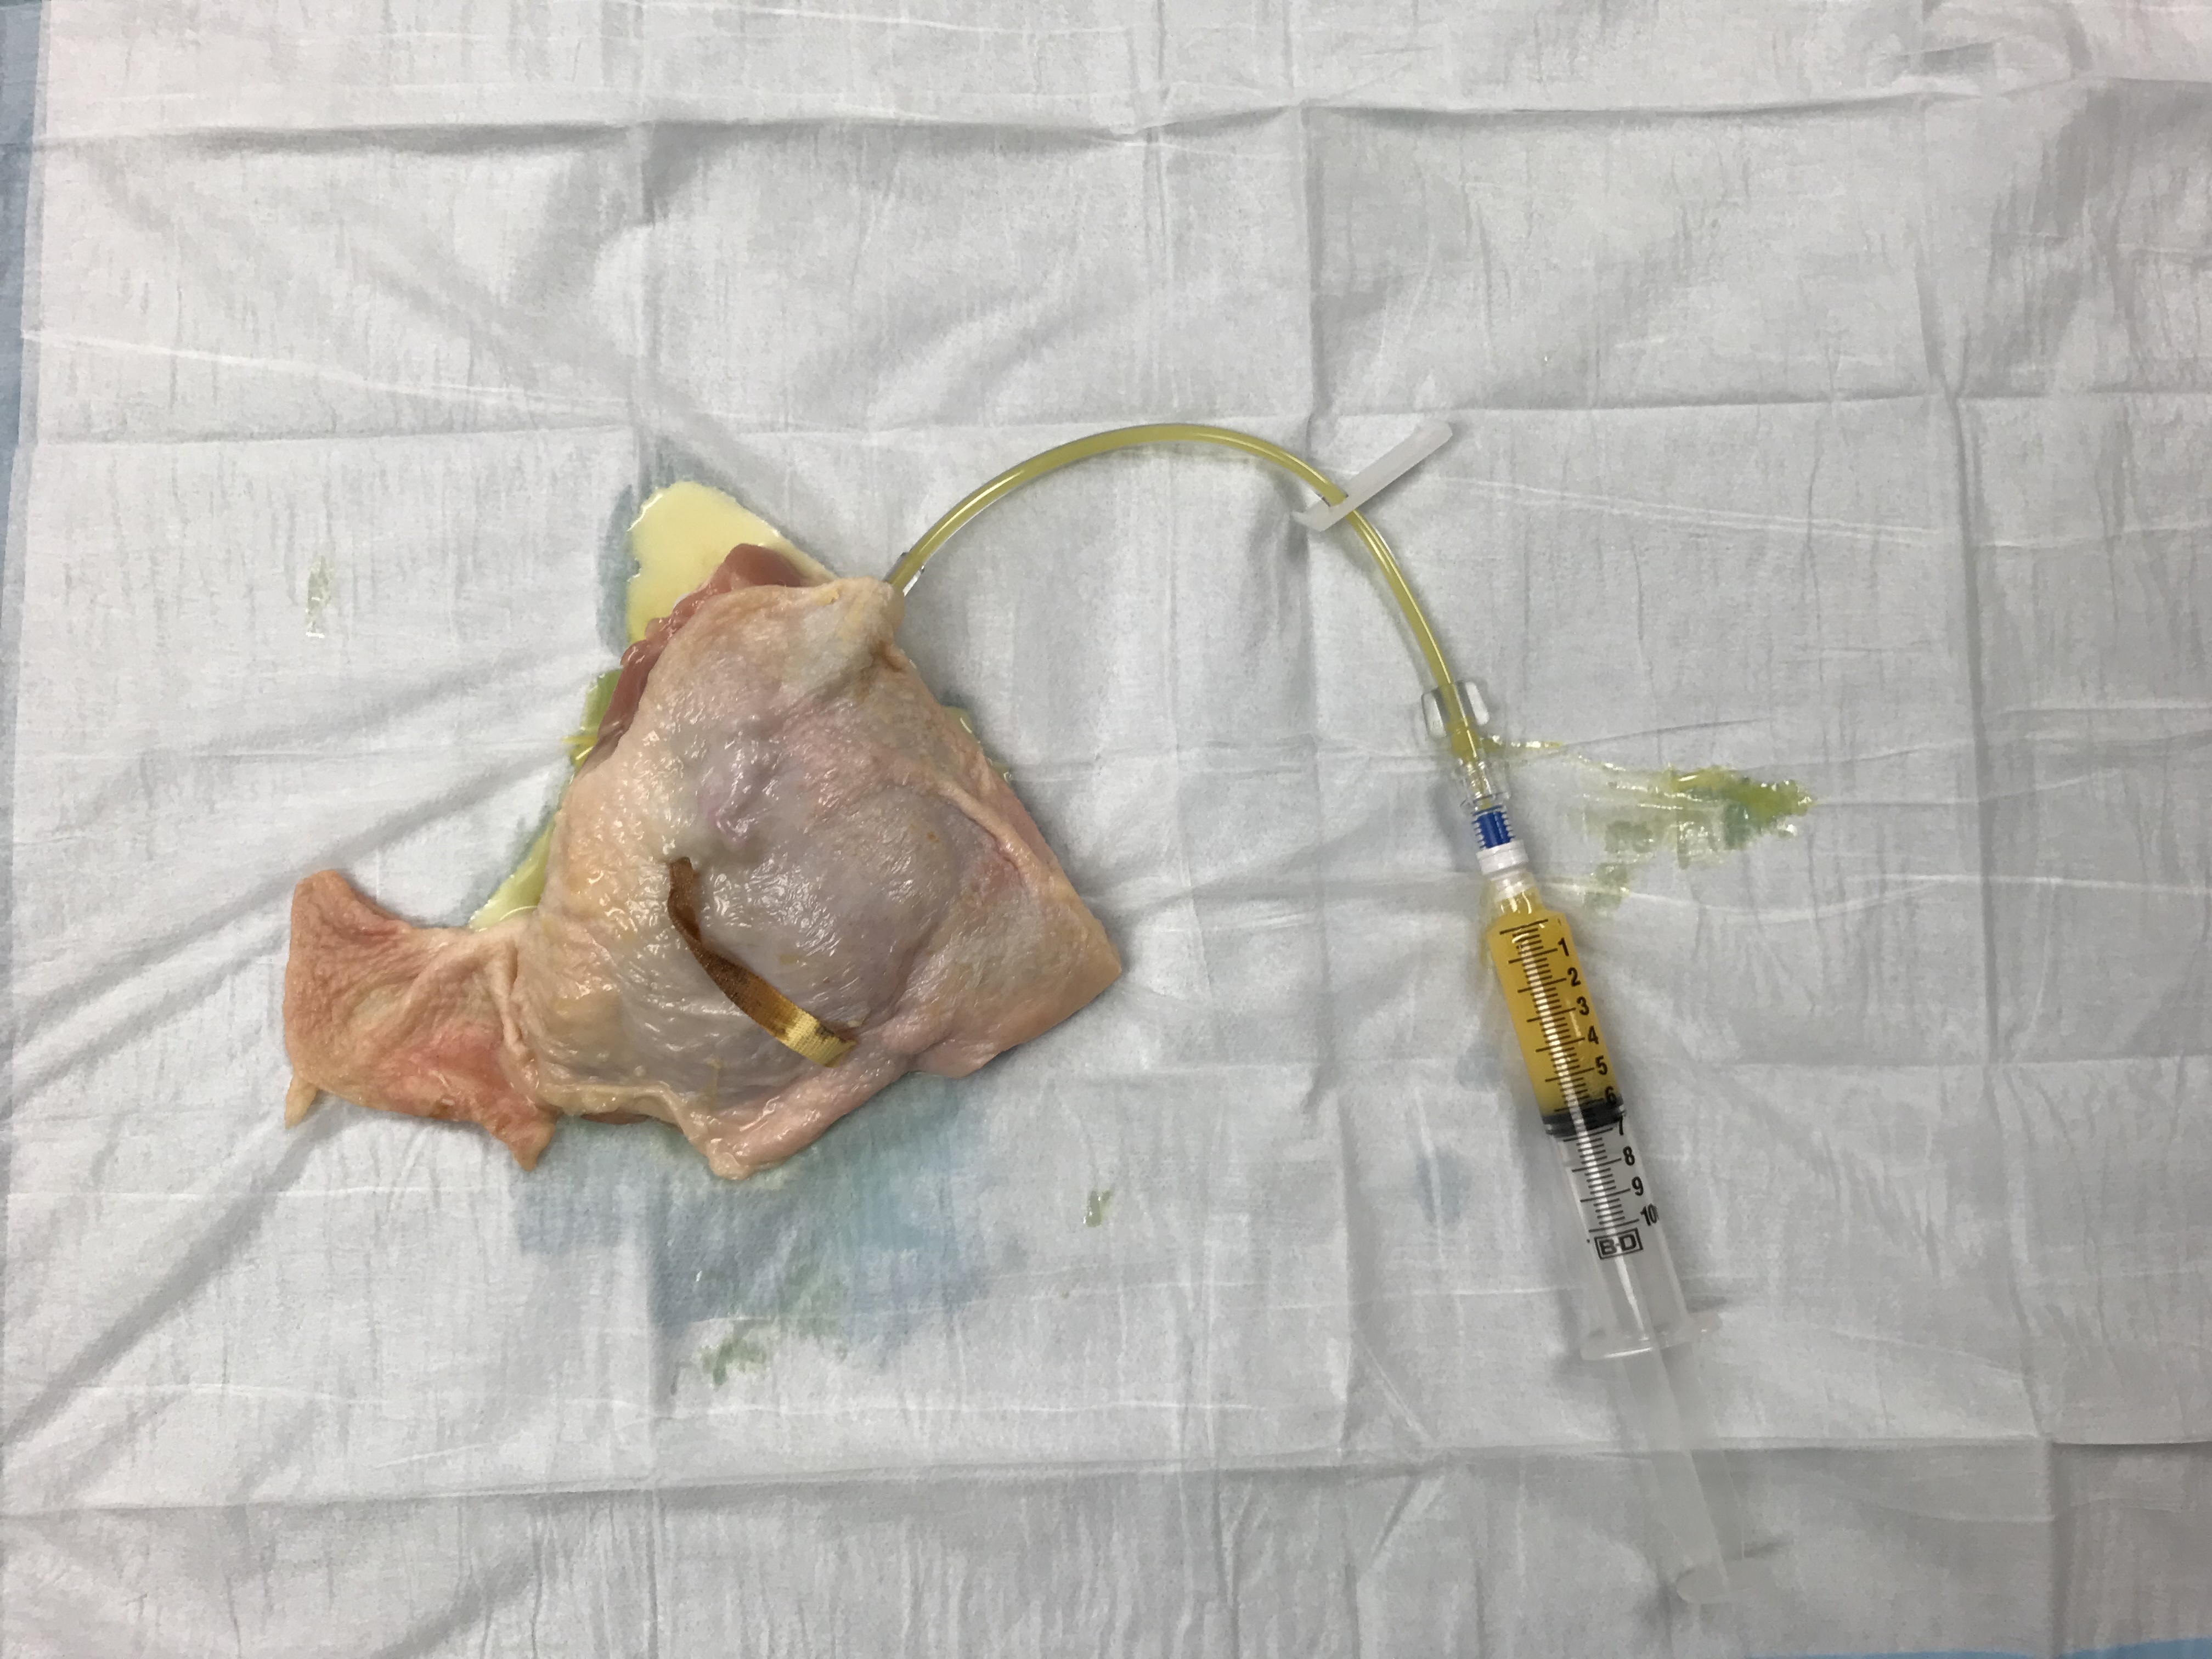
- 10cc syringe, 10 – to facilitate balloon filling (technique demonstrated below).
- 16g or 18g angiocatheters, 10 – regular hypodermic needles can do, but the actual angiocatheter is better for facilitating filling the balloon with less risk of accidental rupture.
- IV tubing, 5-10 – used to push your fake pus into the balloon. The one we used in our model here was an 8” starter line from an IV starter kits, however, any line will do. Just keep in mind that the longer the line, the larger the syringe will be needed to push that much of your fake pus through. IV tubing can be reused for multiple iterations.
- #11 Scalpel, 1 or more – technically, any scalpel can be used if you are short on supplies, but textbook-wise, the #11 scalpel is your go-to for good I&D technique. A scalpel can be reused for multiple iterations if you are short on supplies.
- Fake Pus – there is a broad list of proper ingredients to use for fake pus. On the civilian side, there were suggestions of mushed bananas and corn starch. The articles above mentioned several ingredients, including maple syrup, mayonnaise, and polenta. We want to stress that whatever you decide to use, remember that it must be small and liquid-enough to push via an IV line. Therefore, although it does replicate pus well, mushed bananas were out, as they kept clogging the line. We settled on a combination of mayonnaise, light corn syrup, honey, and a few drops of food coloring (pictured below). The mayonnaise is really key to a nice, thick, creamy purulent-looking mixture. (Not wanting to experiment with mixing and matching foods? We recommend looking in the baby aisle for some pureed baby food).
- Optional – local anesthetic training aids (discussed below), eye protection (realistic training – those who have been splattered before, know what I’m talking about!), cotton tipped applicators (medical Q-tips) for probing, normal saline flushes (to irrigate – although drawing up some water in a 5-10cc syringe works too!), iodoform or sterile gauze packing material
Training Model Instruction and Preparation
- First, ensure you have a solid block of instruction is given on basic abscess pathophysiology and I&D management. Additional information on everything you could hope to know about SSTIs can be found here for free from the Infectious Disease Society of America, but if you don’t have the time to make a presentation, we did the research and got you covered. The New England Journal of Medicine created a great 10-minute video slideshow on everything you need, found here on YouTube.
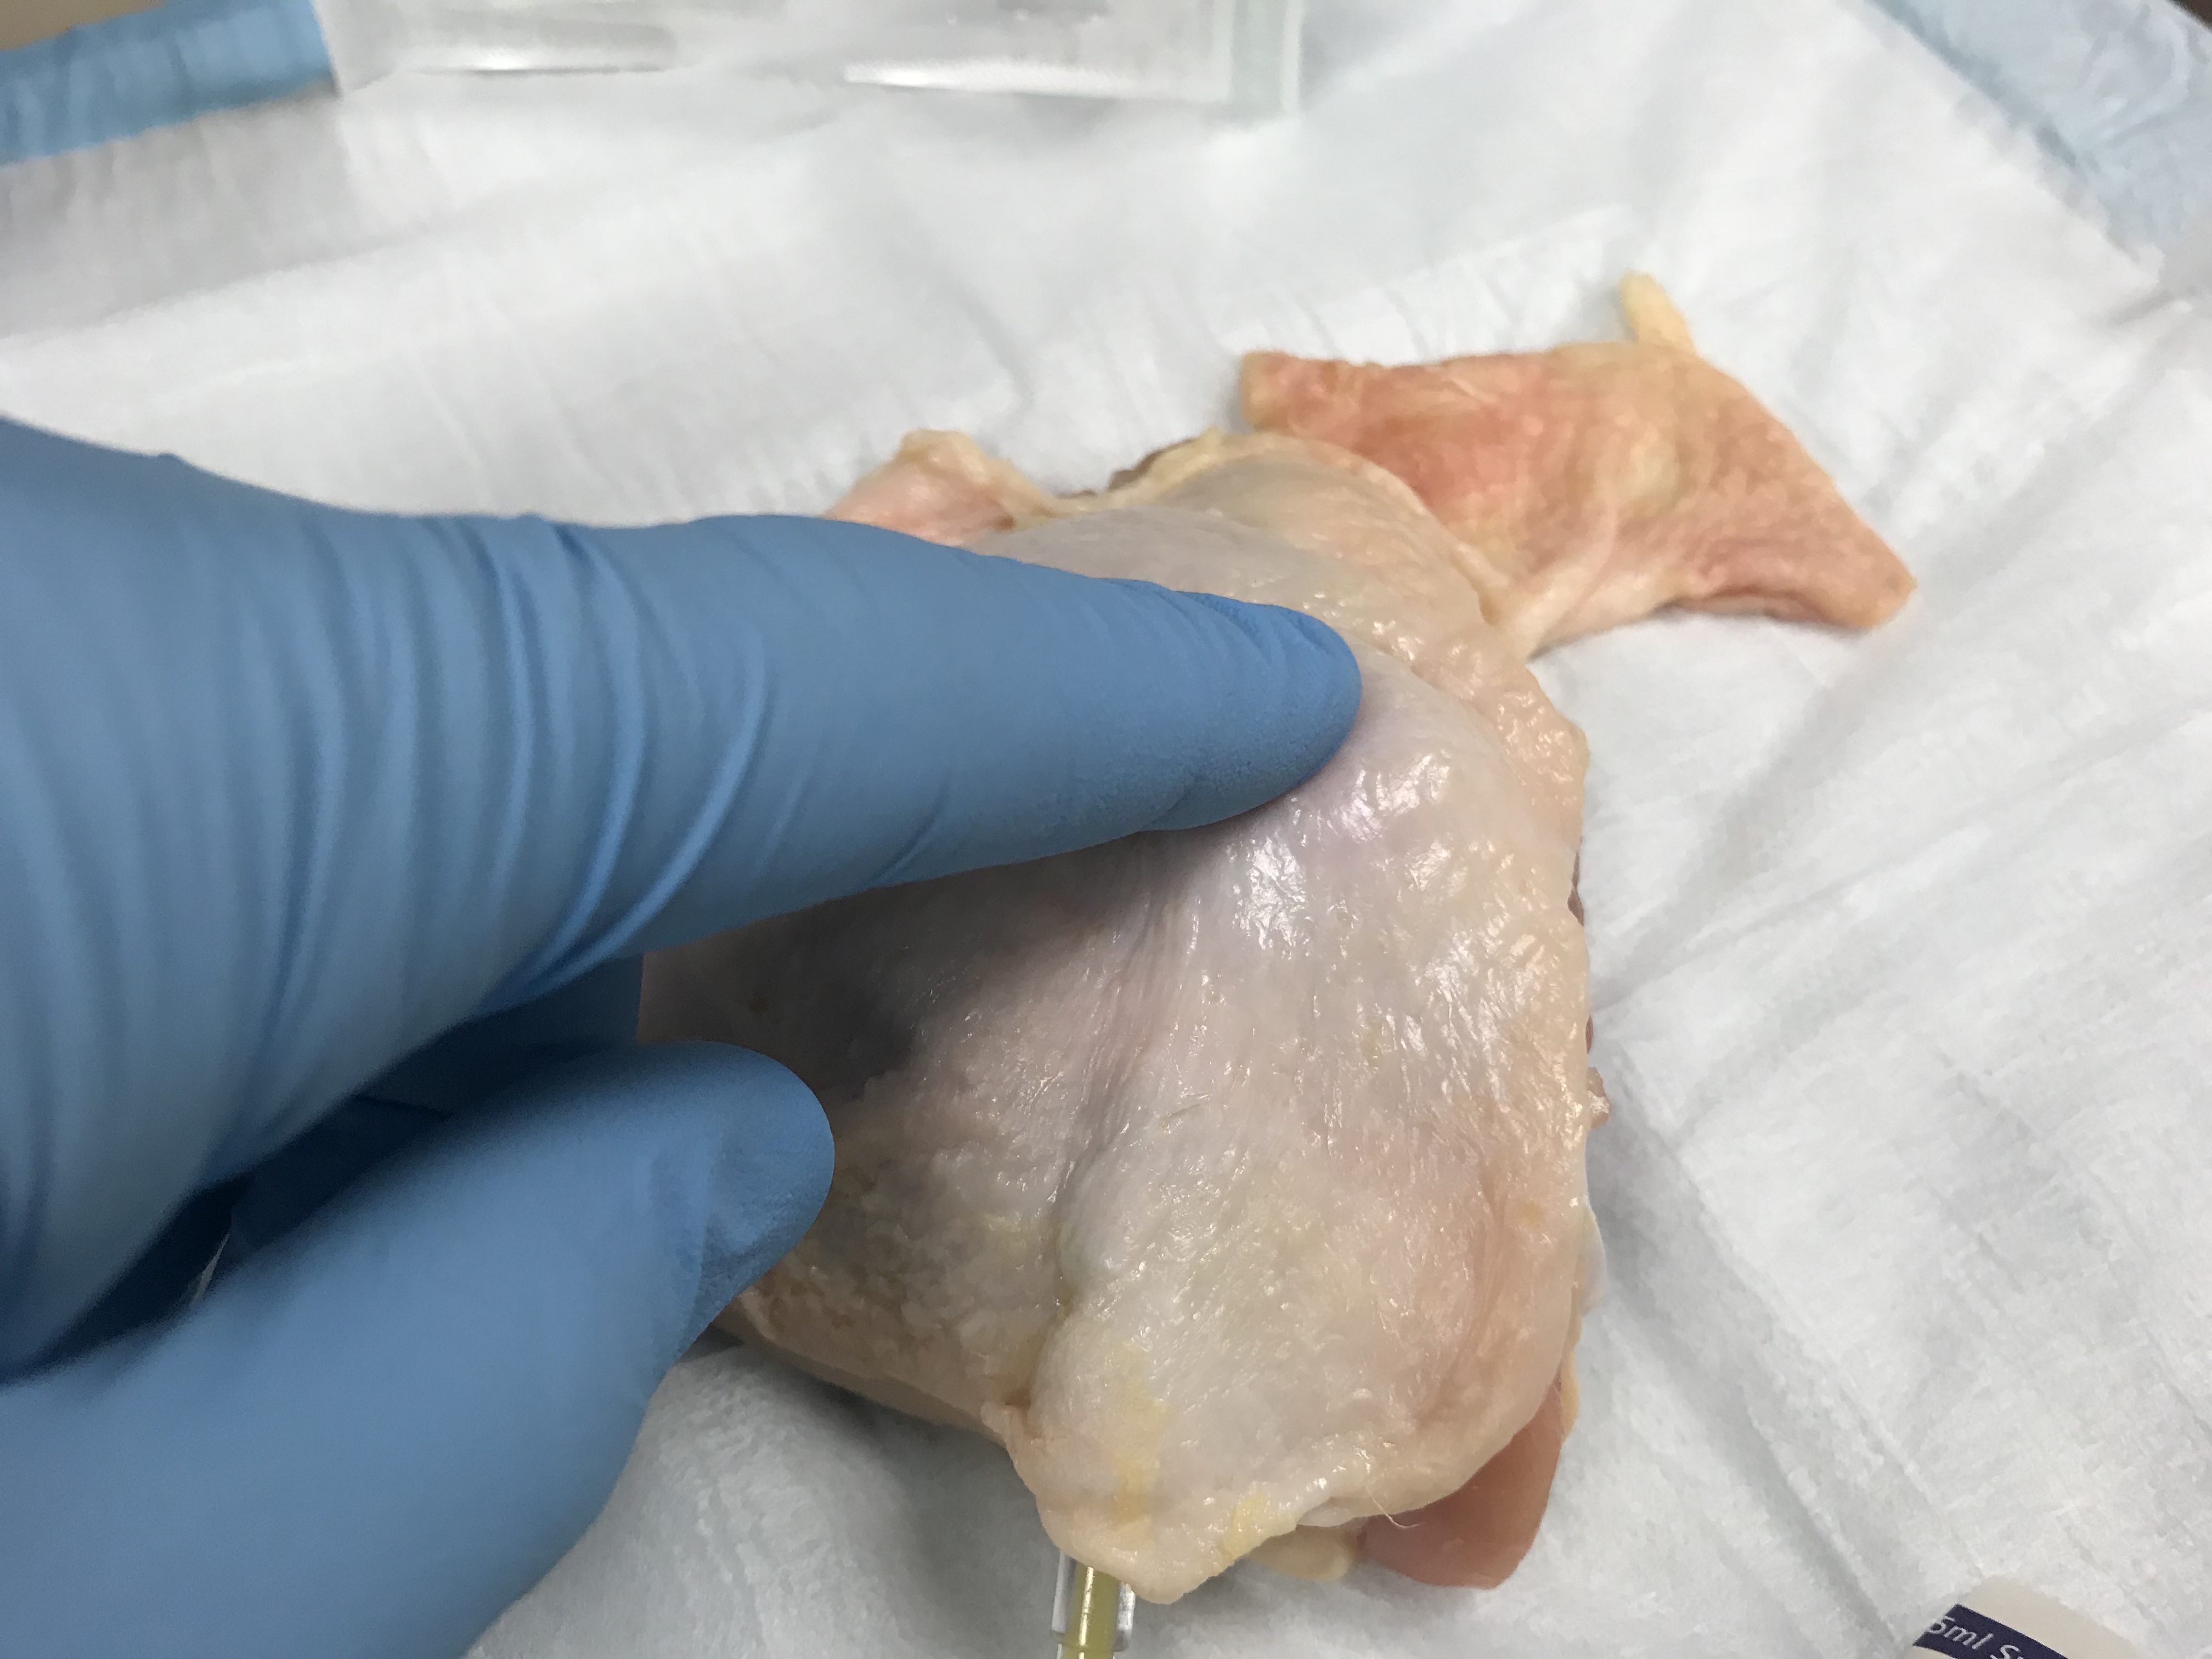
- After instruction, assign 1-2 medics to a chicken thigh model for hands-on skill stations. Medics can prepare their own model with the ingredients and steps below, and then take turns palpating the fluctuant, erythematous-appearing subcutaneous mass to familiarize themselves with identifying an abscess by both sight and feel. After using a good clean technique to inject “lidocaine with epinephrine” via real medication, or sterile water with training aid labels, you can begin an I&D procedure.
- Assemble your ingredients
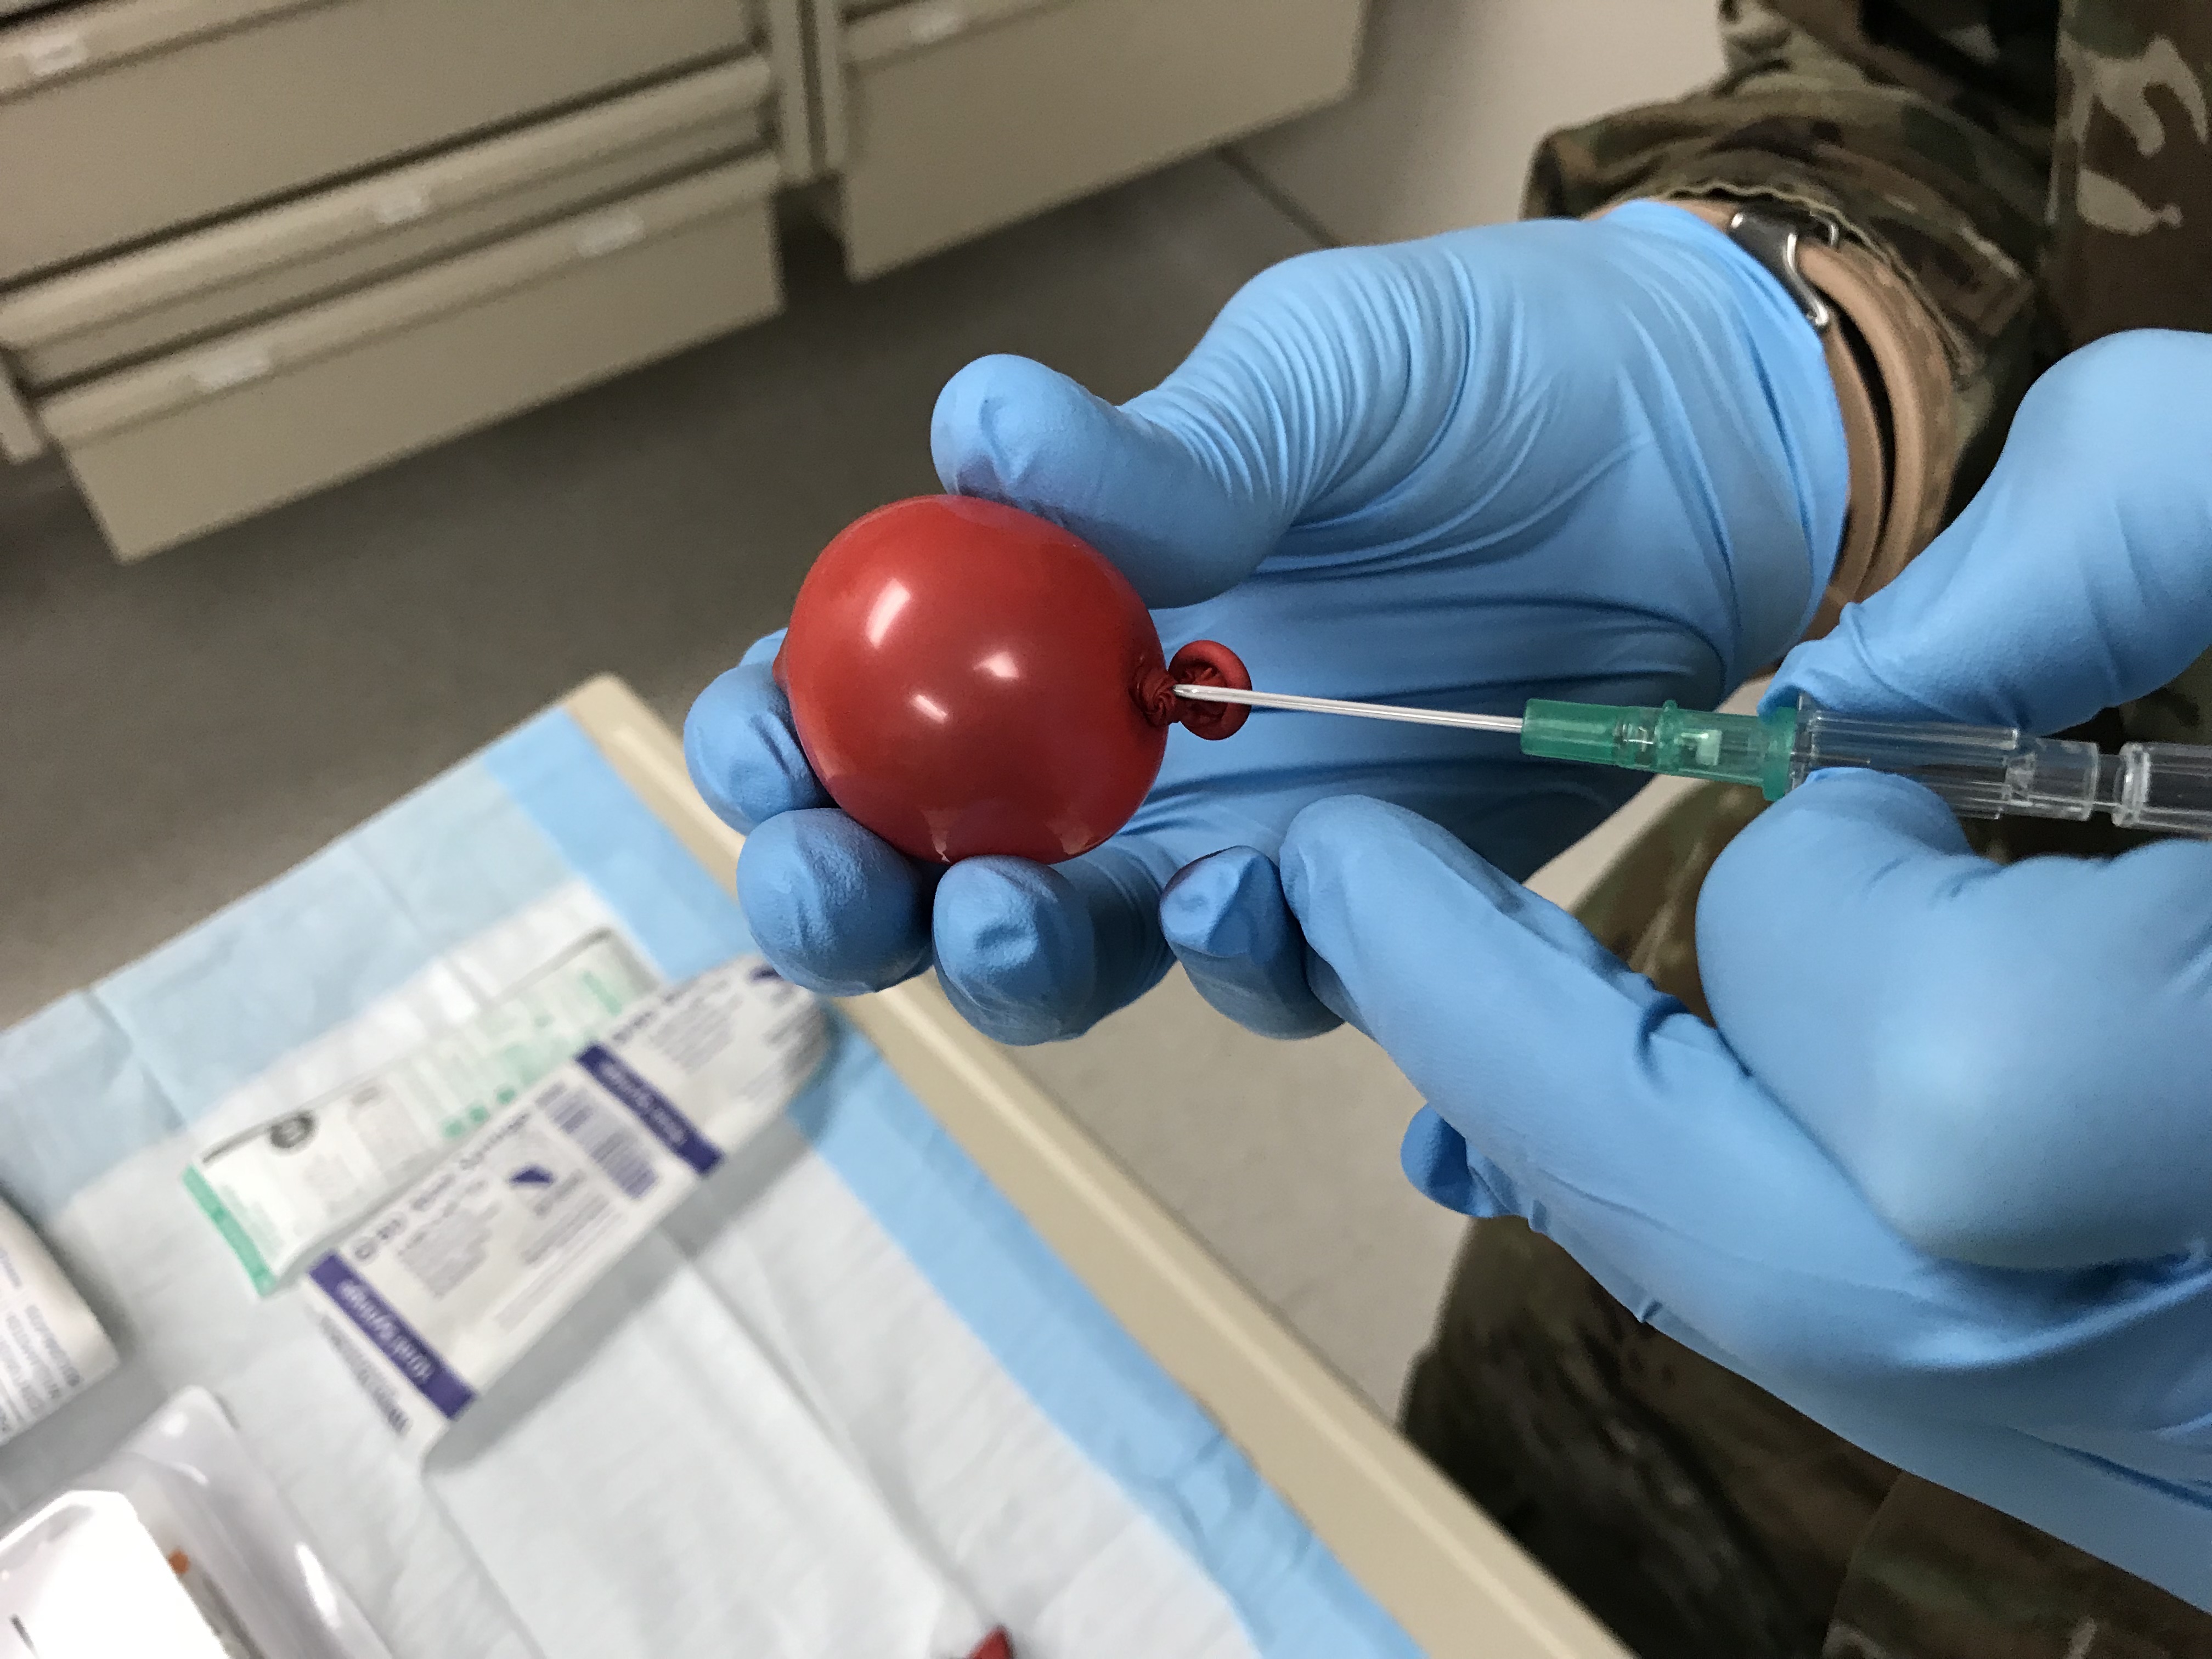
- Blow up your water balloon with air
- Insert a 16g or 18g IV into the balloon (directly through the knot in order to prevent popping)
- Remove the needle (but keep the angiocatheter in!) and allow the balloon to drain. Squeeze out any excess air.
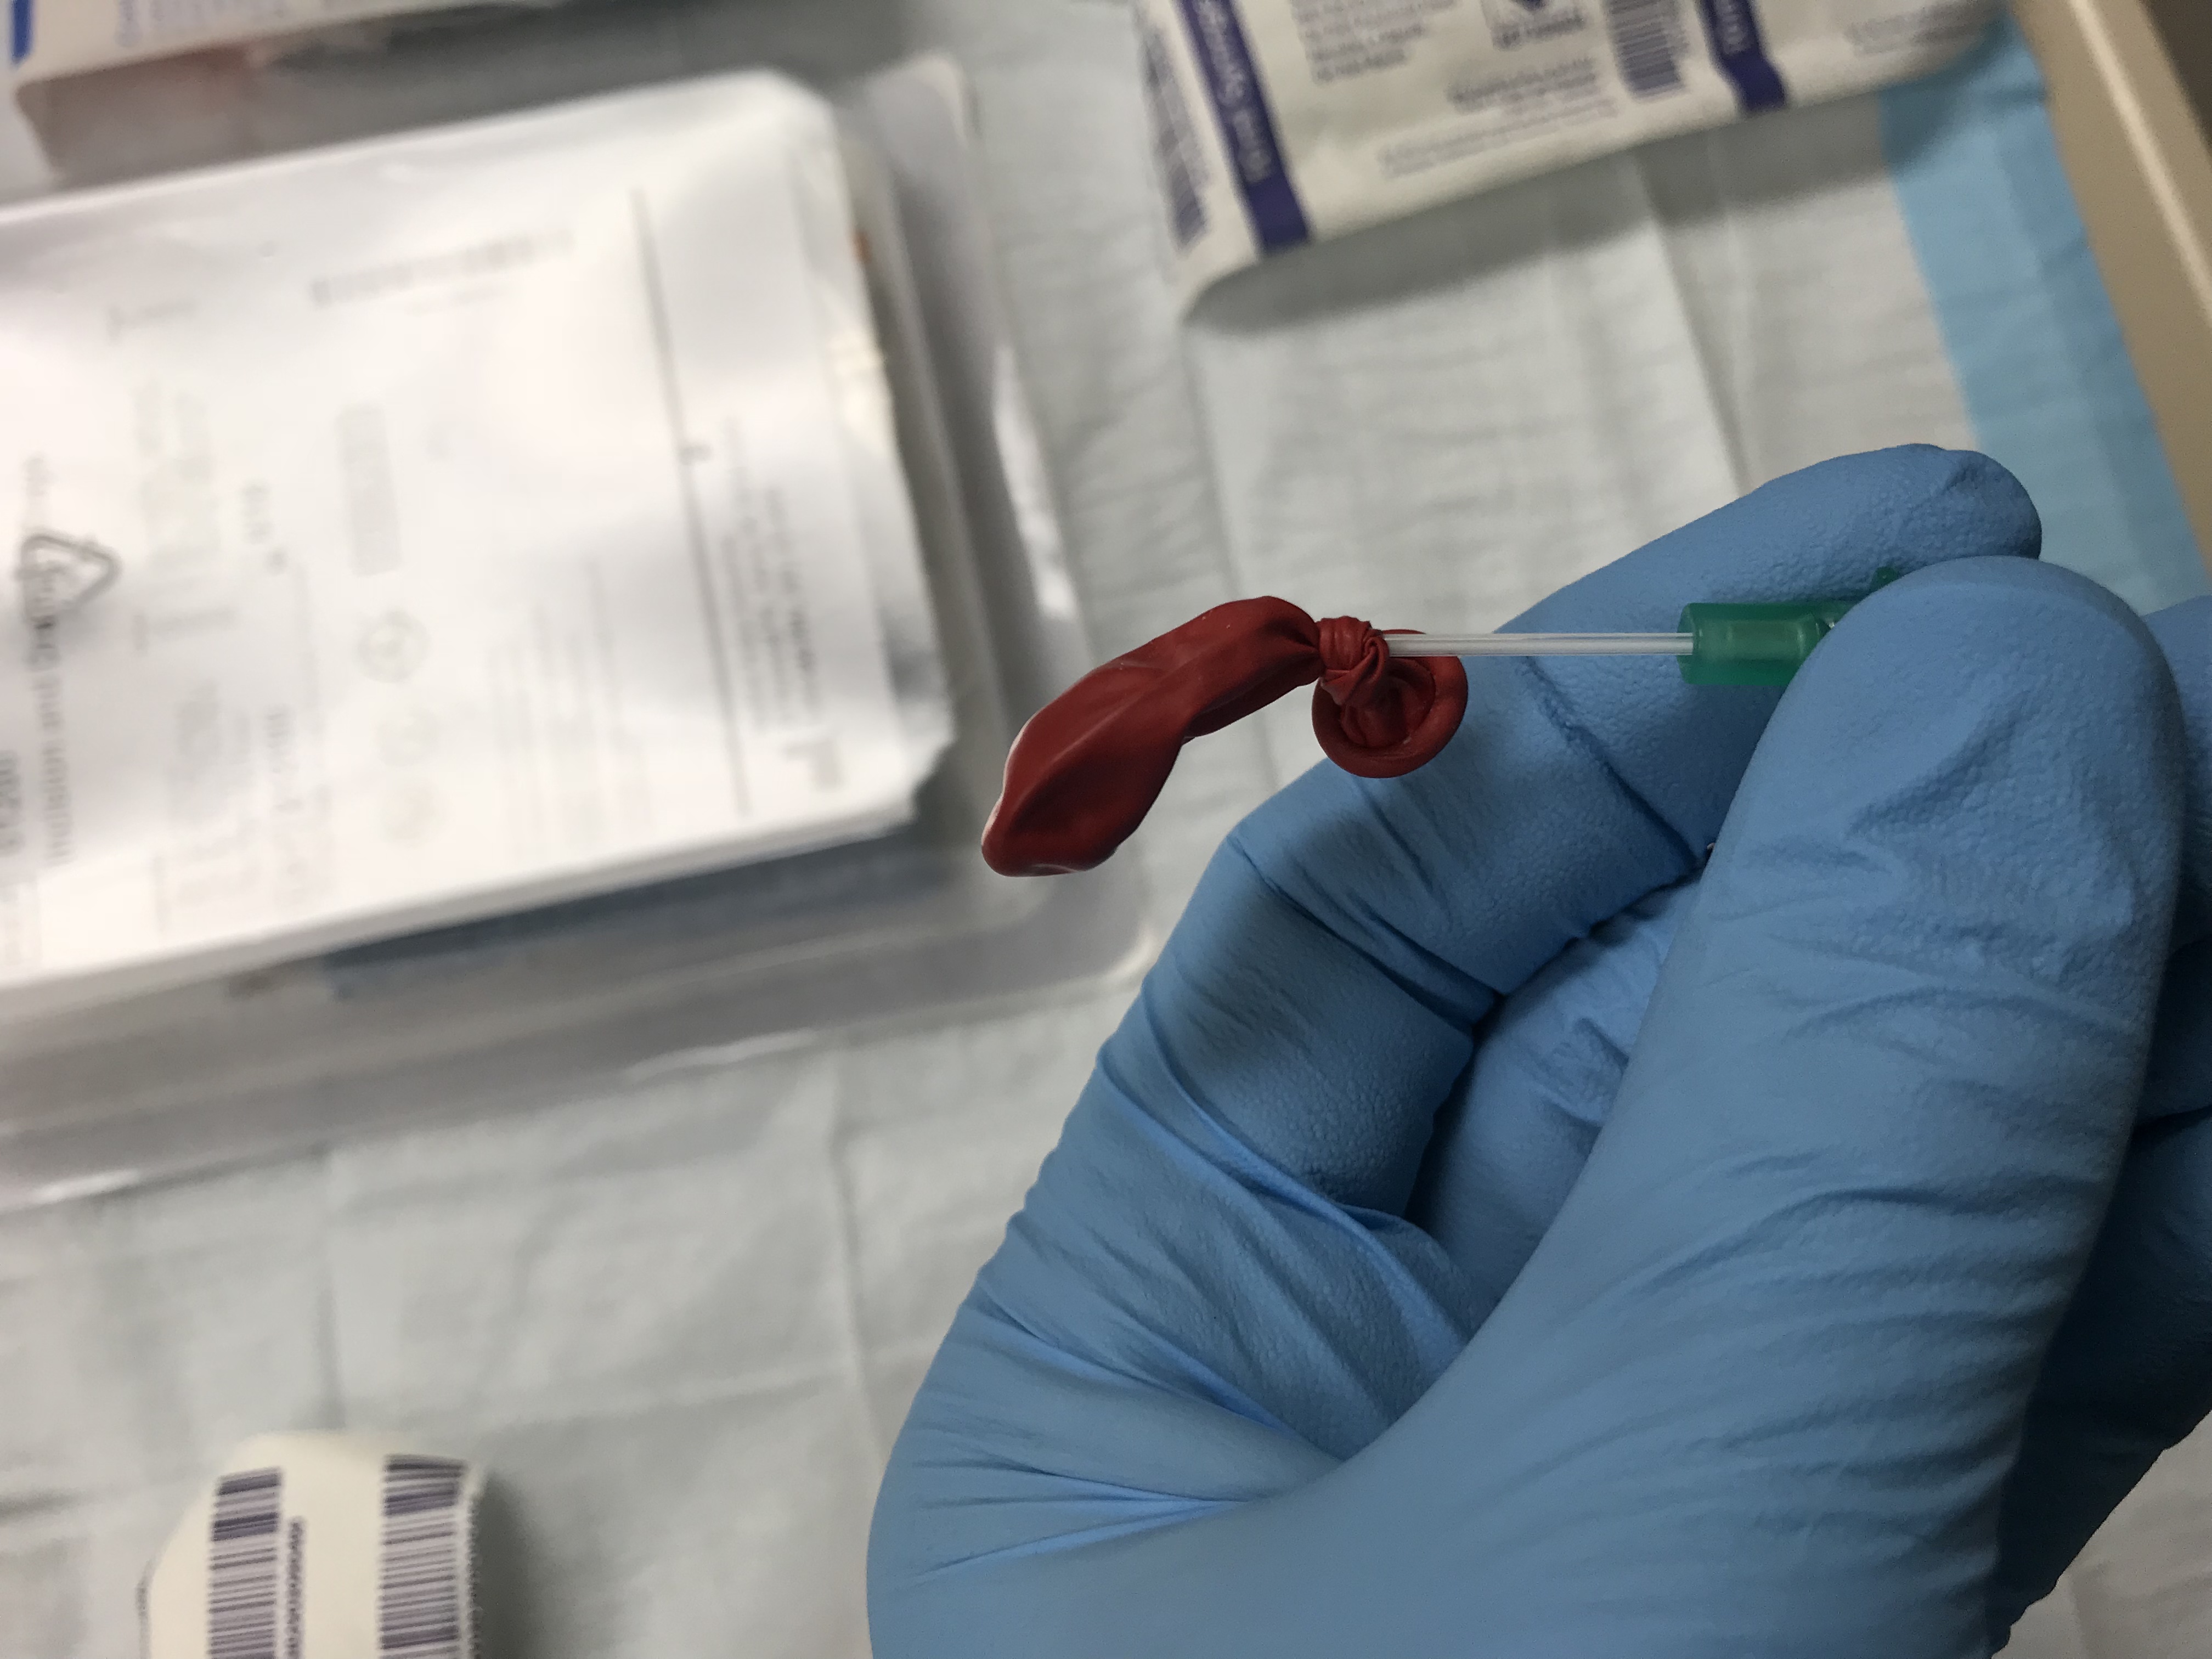
- Draw up your pus material in the syringe
- Attach the short IV tubing

- Ensure you bleed the IV tubing of air before attaching it to the needle (or else your balloon will fill with air instead of ‘pus’!)


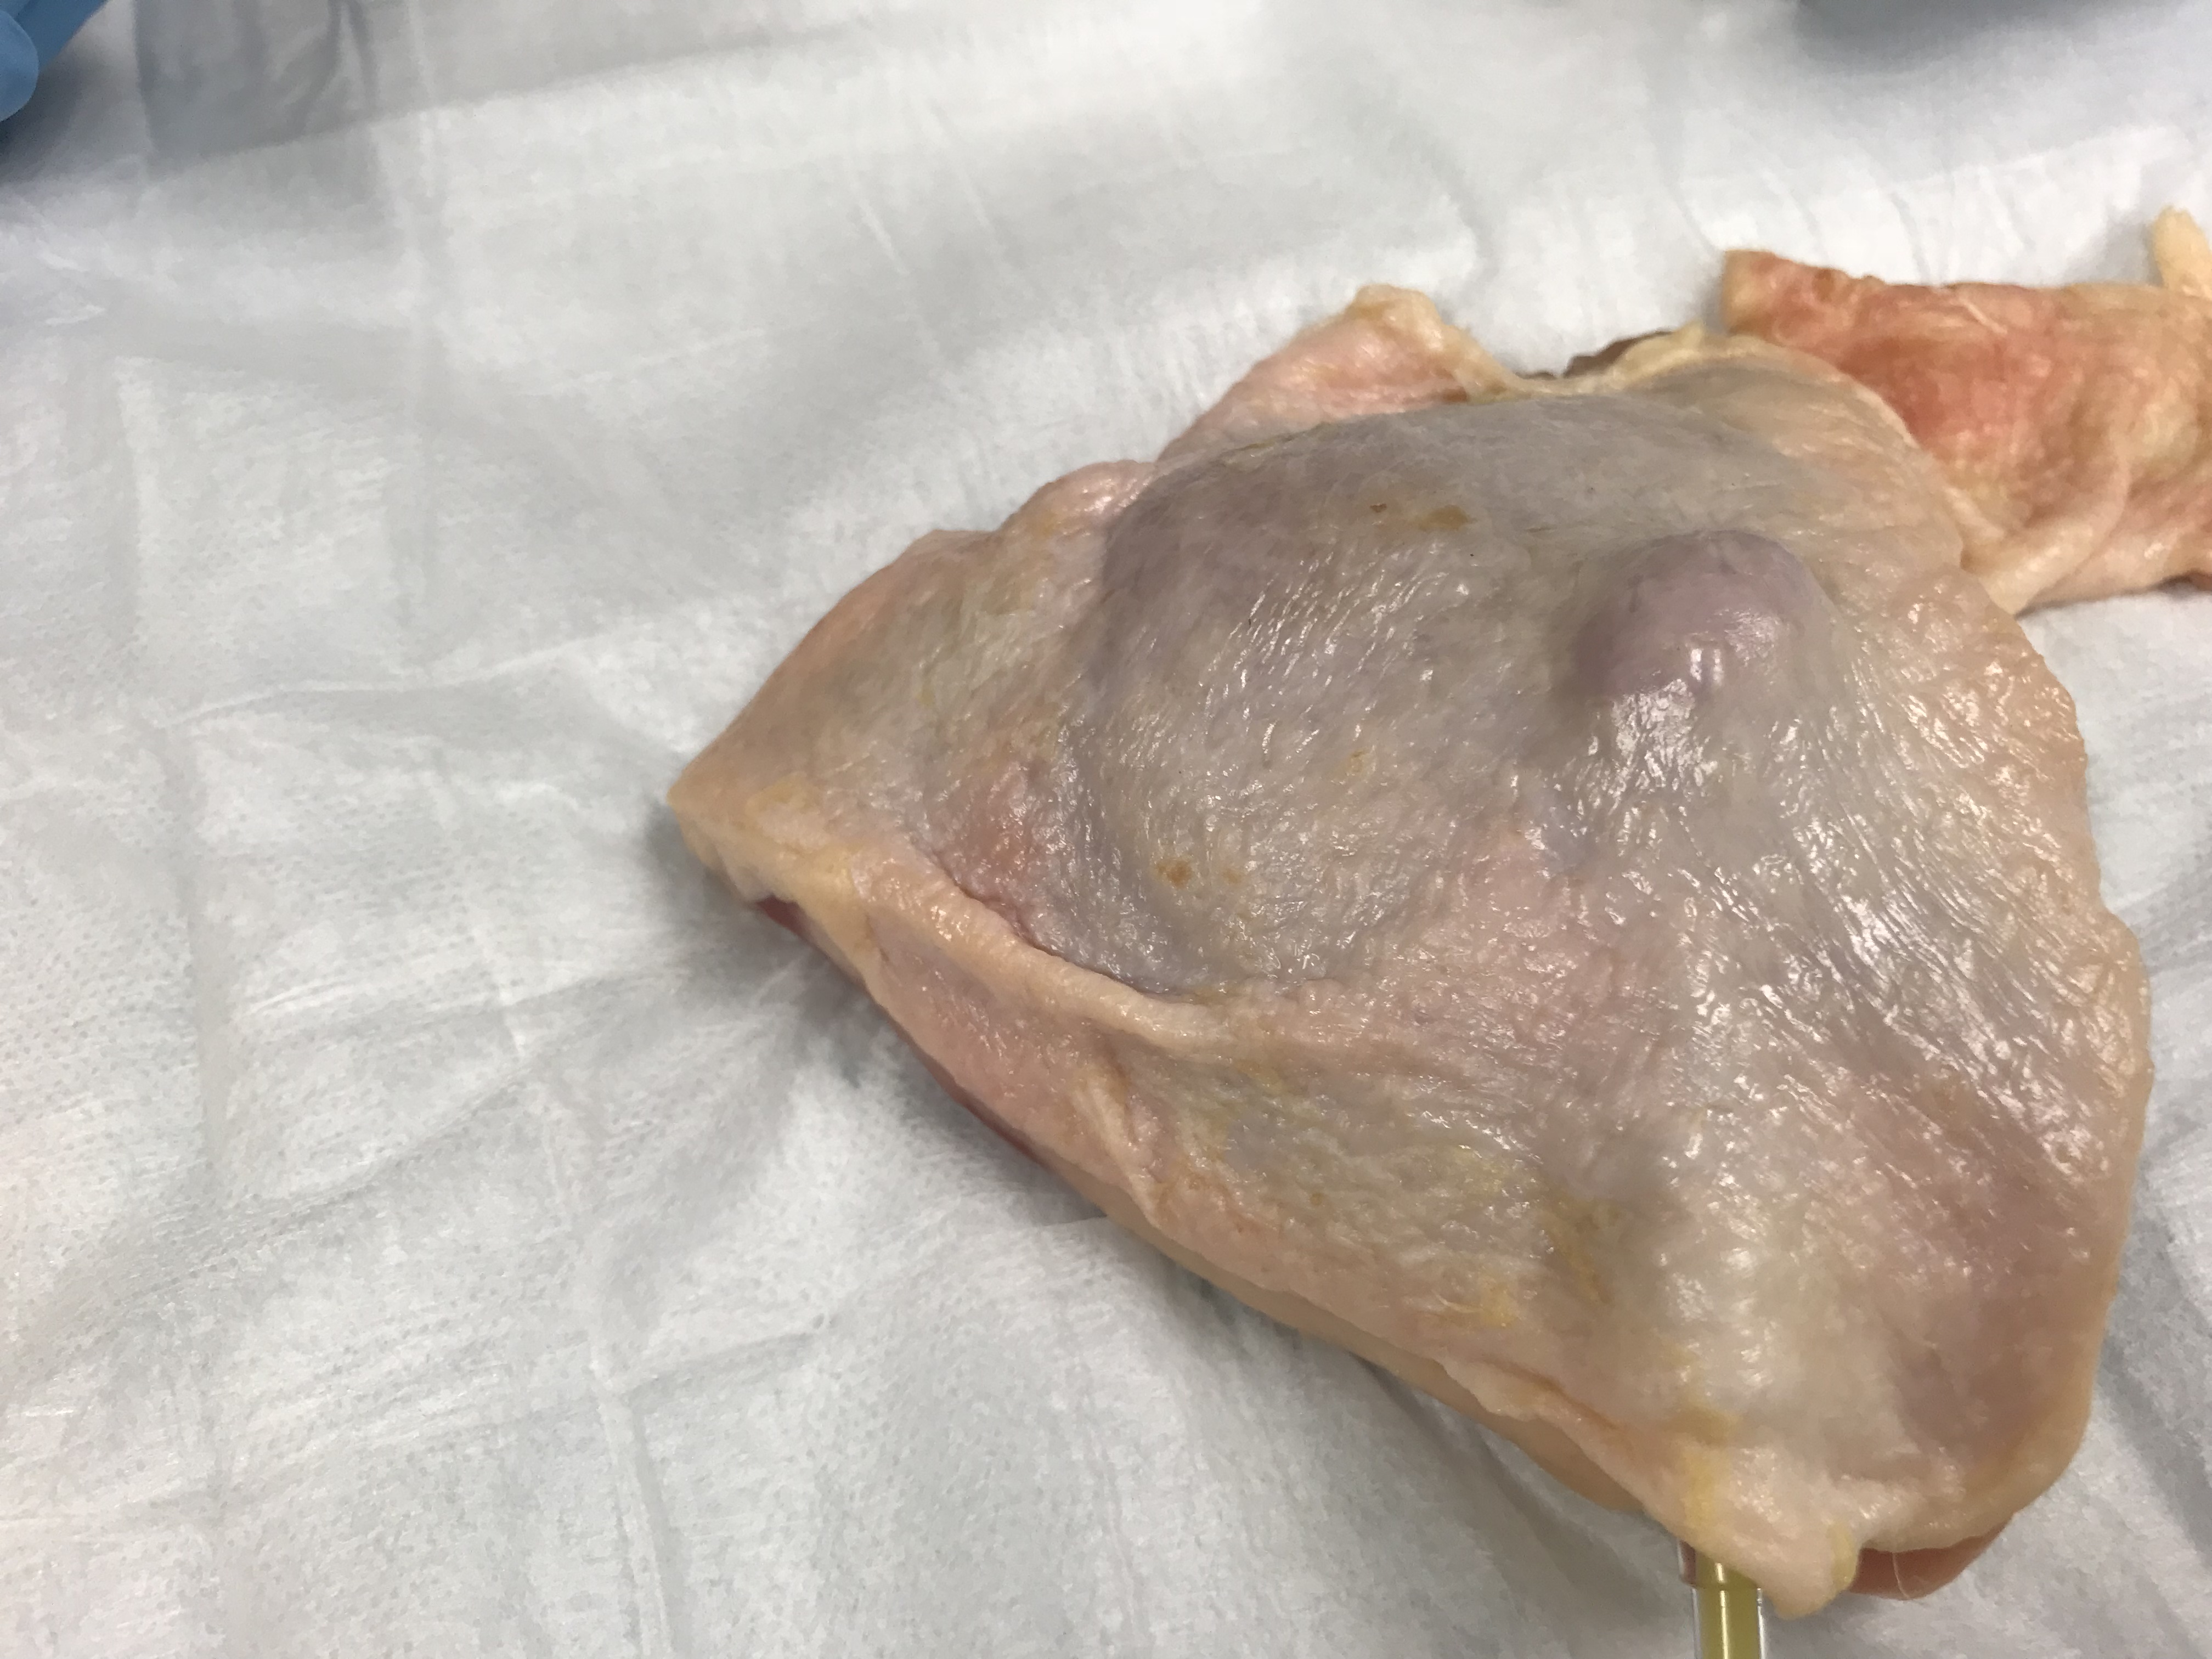
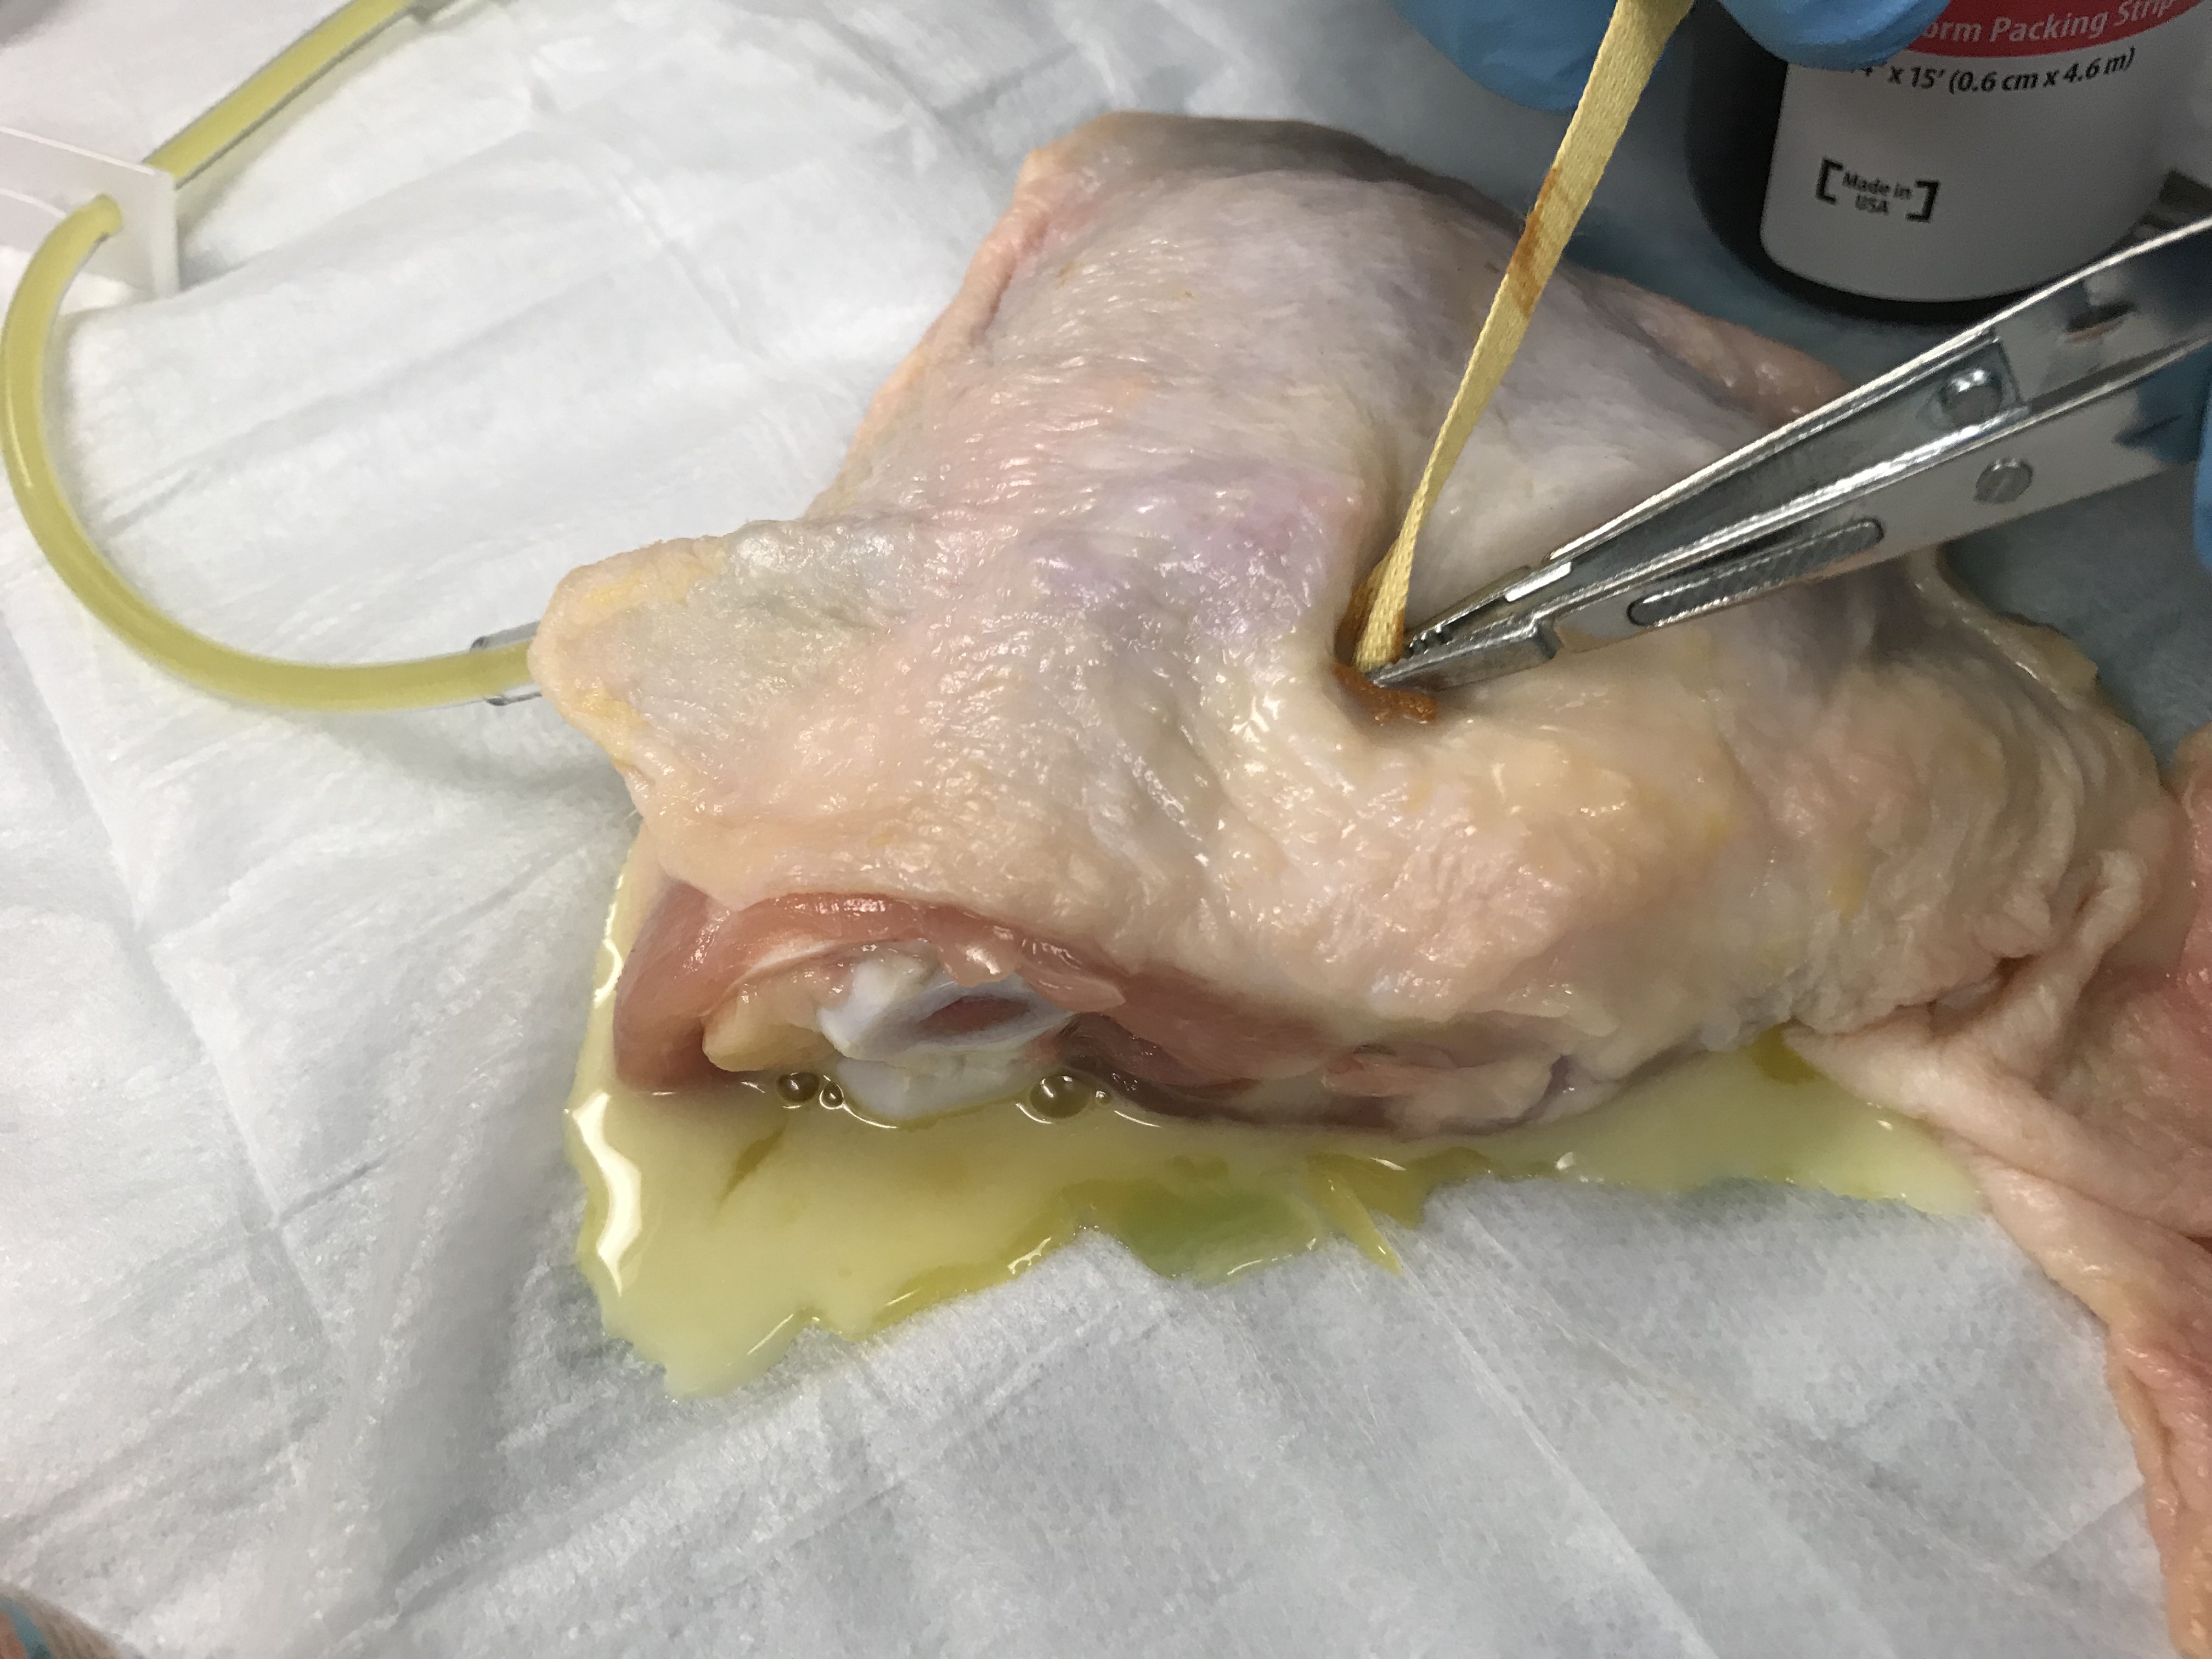
- Tuck the deflated balloon beneath the chicken skin
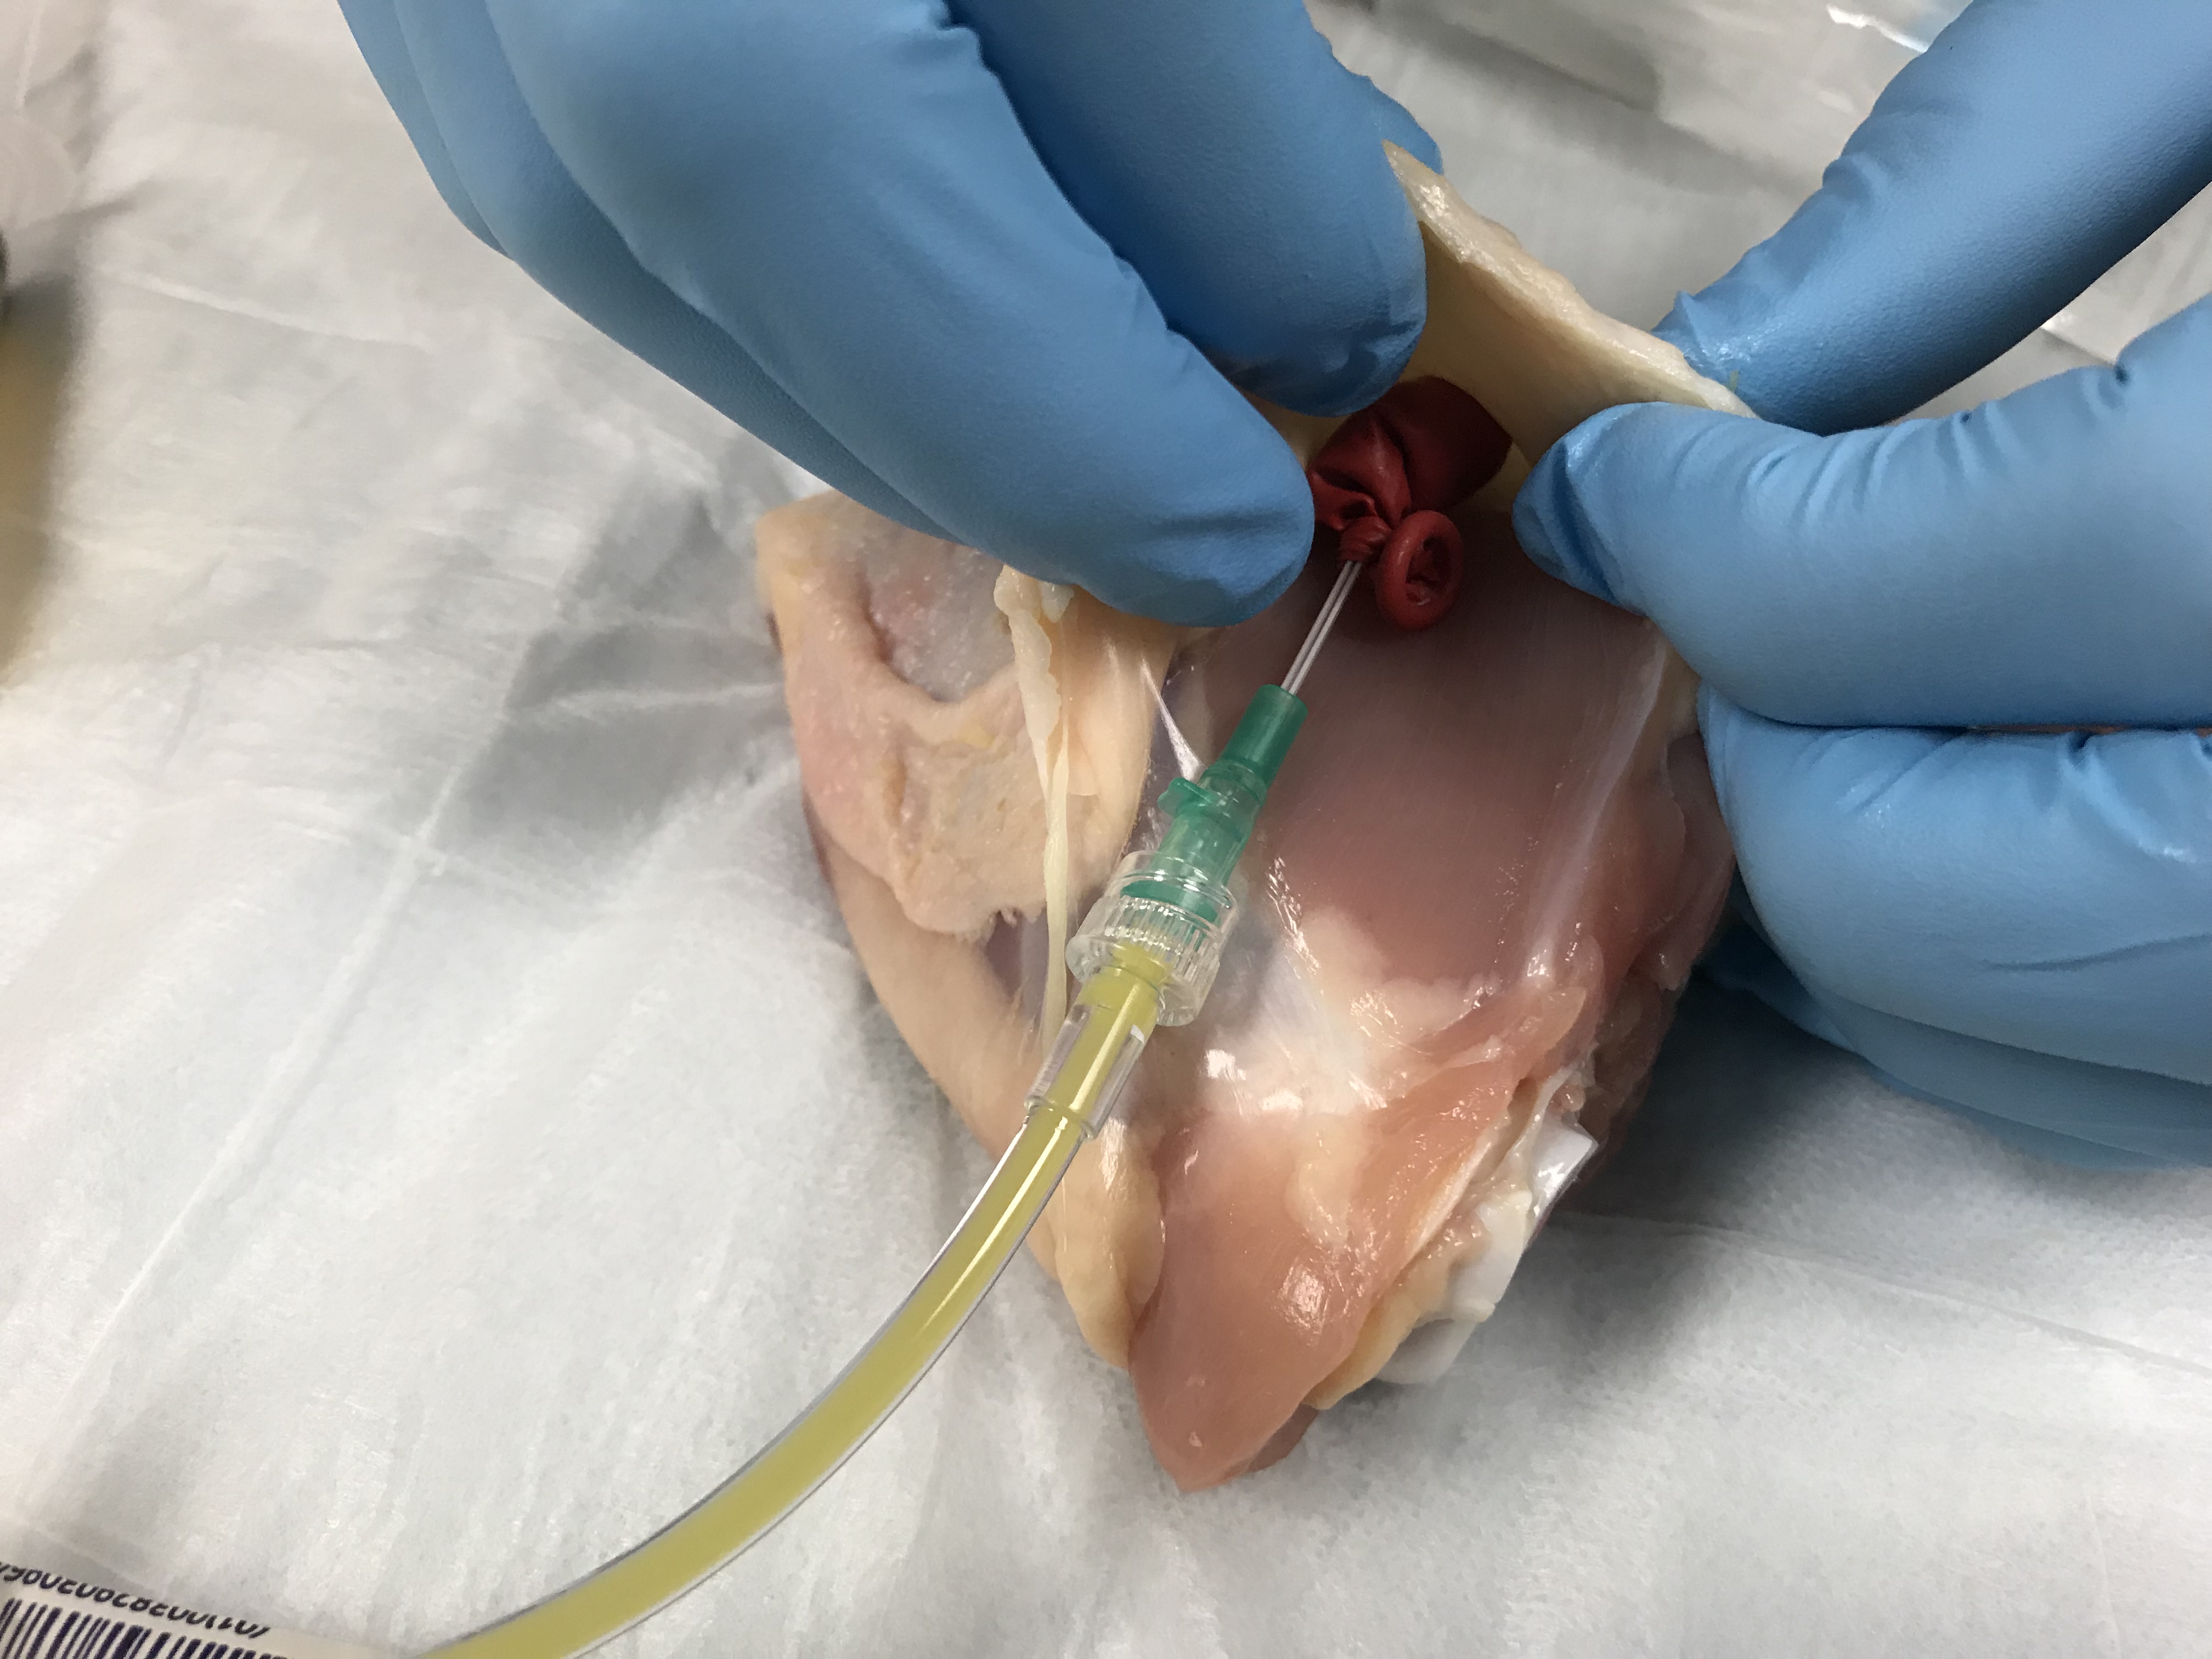
- Push your pus mixture into the tucked balloon slowly to the proper size (2-3cc is plenty), and voila! You have created a small soft tissue abscess!
Directions
- Spend time identifying and palpating
- Local Anesthetic training can be accomplished with real or notional anesthetic integrated into this lab. Medics should practice local lidocaine injections with good technique. As mentioned previously, DO NOT eat any chicken if you are injecting any actual anesthetic. Instead, use normal saline or sterile water vials with training labels applied if post-suture ingestion and digestion is planned. (Note: injection should be in the surrounding field and DO NOT INJECT DIRECTLY INTO THE ABSCESS. Not only would you likely prematurely rupture the abscess, both in real-life and in the balloon training aid here, but in real-life local anesthetic has been proven to be less effective when placed directly into an abscess because of its lower pH, which neutralizes the acidic lidocaine) Practice good technique!


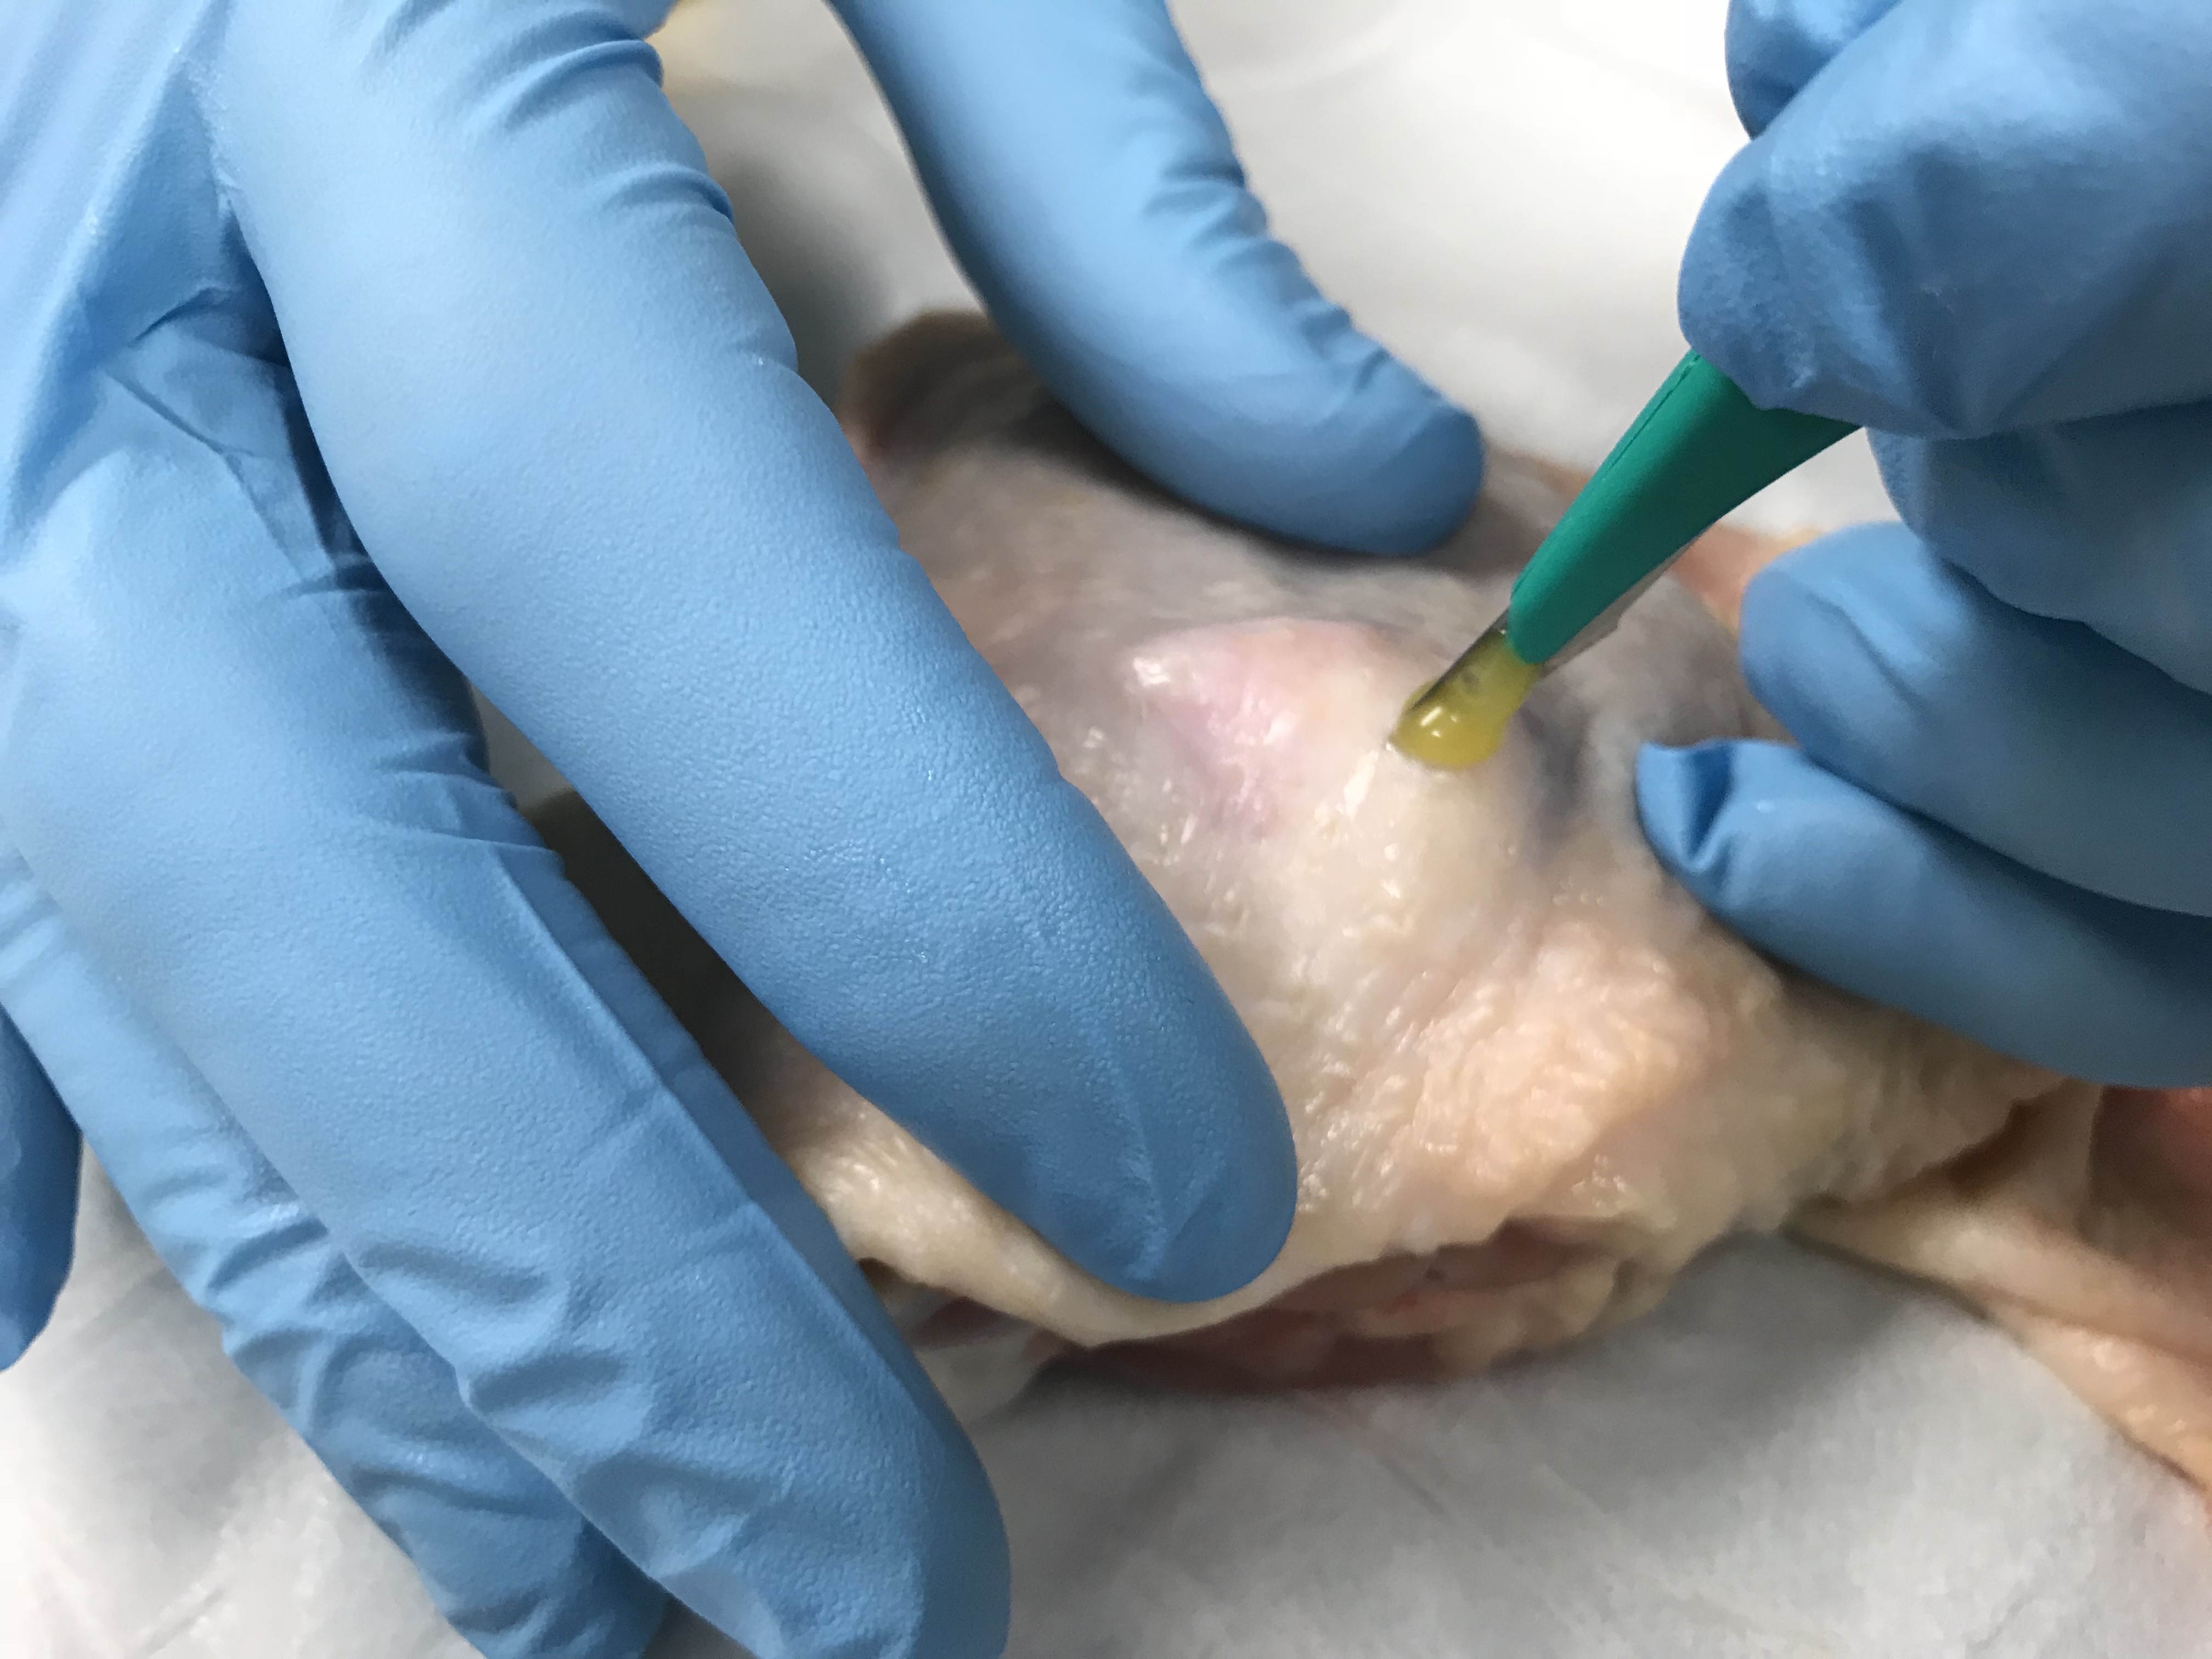
- Incise the site – there are several variations on how to incise (pulling the skin taught, angle of the #11 blade scalpel), but there are a few important principles to remember: 1) the goal is to pierce the abscess and create an opening, not fillet it completely; 2) incision should be done over the center of the suspected abscess site (i.e. don’t start or end at the edge)
- Probing is often used to help break-up loculations, or small, semi-walled-in areas of purulent material within an abscess. No previous literature has been able to develop a loculation model, and we were not able to come up with one at this time. Medics can use a cotton-tipped applicator (CTA) to probe the abscess after initial expression.


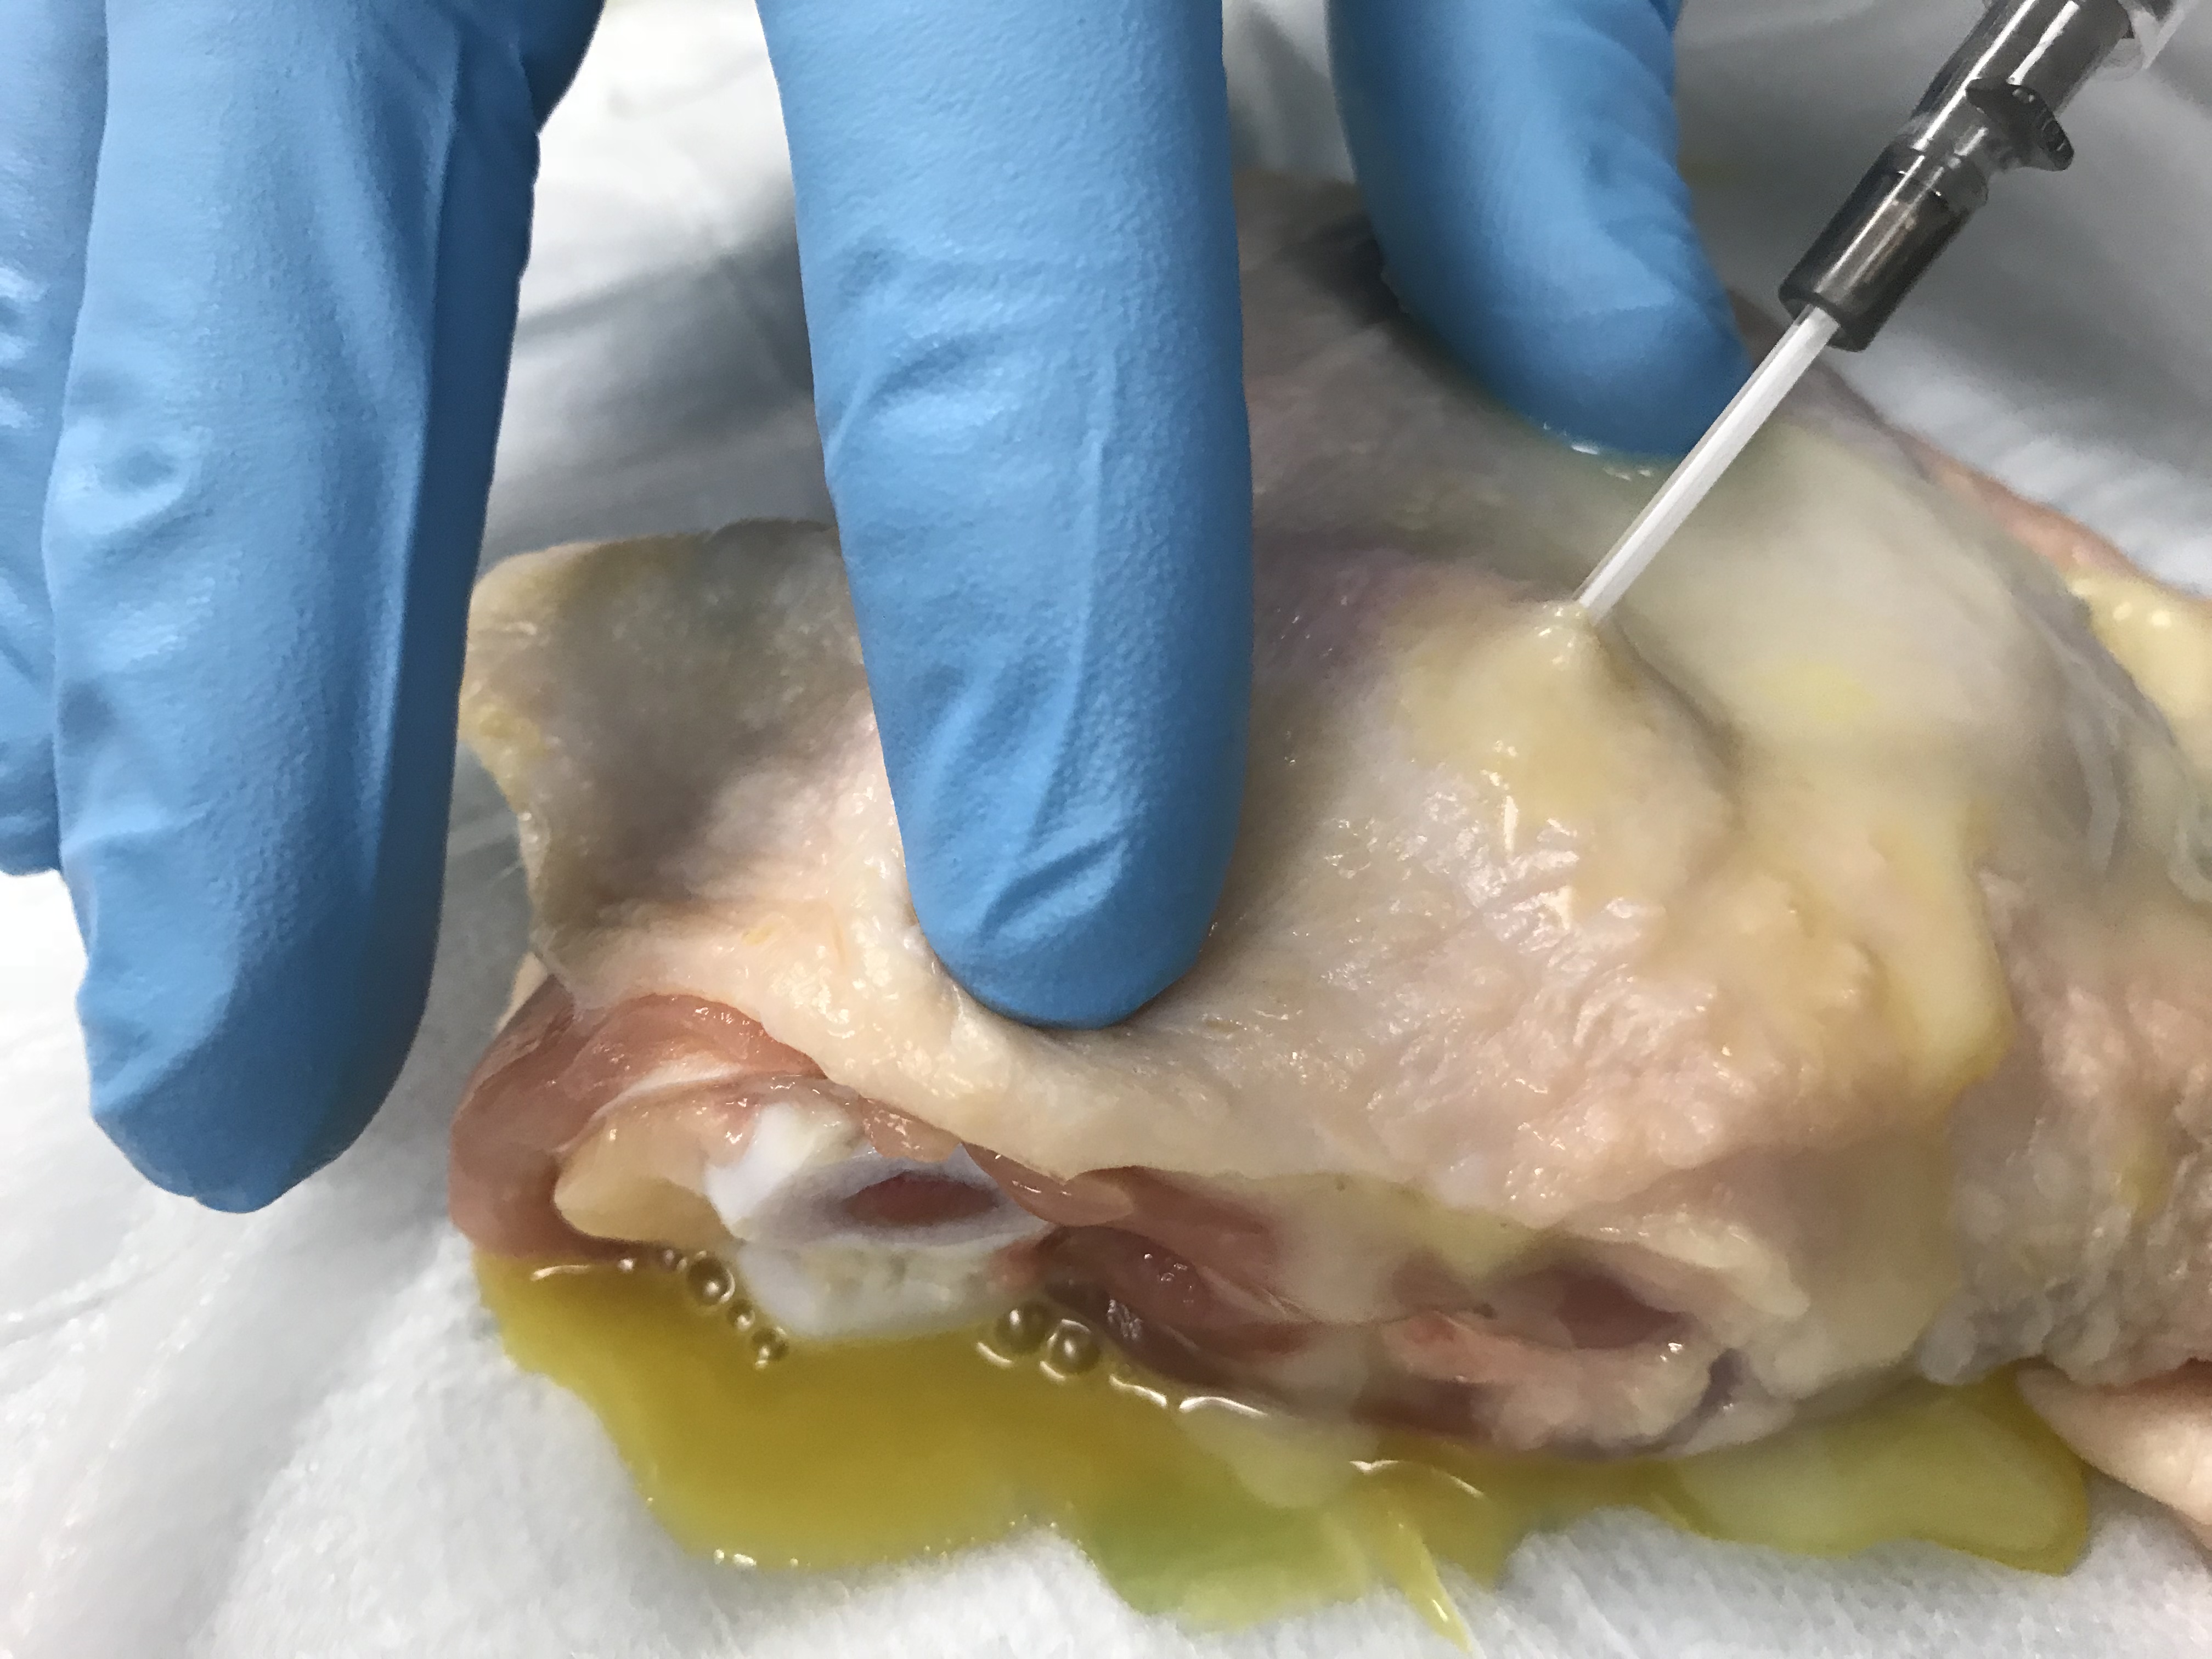
- Irrigating can be a vastly-underrated adjunct procedure to I&D in the treatment of an abscess. At the end of the drainage simulation, have medics simulate irrigating the abscess with multiple saline flushes, which can be easily reused with water. In actual patients, this helps to further dilute bacteria to facilitate greater resolution of the infection.
- Packing is a good skill to practice for large abscesses (some literature supports only abscesses > 5cm in diameter), but even smaller ones can be helped by leaving a small piece to stay open. Ideally, the exposed part of the gauze packing, sometimes called the “wick”, should be secured to the skin with tape and a dressing, but this is difficult on the chick model given the moisture of the skin.
So, there you have it. A simple, low-cost simulator that you can use multiple times for good training in the recognition and treatment of a basic subcutaneous abscess.
Disclaimer: The views expressed in this article are those of the author and do not reflect the official policy or position of the Department of the Army, the Department of Defense, or the US Government.
References:
Augenstein JA, Yoshida H, Lo MD, Solari P. A readily available, inexpensive, and reusable simulation model for teaching ultrasound-guided abscess identification and drainage. J Emerg Med 2016;50(3):462-5.
Ellis MW, Schlett CD, Millar EV, et al. Hygiene strategies to prevent methicillin-resistant Staphylococcus aureus skin and soft tissue infections: a cluster-randomized controlled trial among high-risk military trainees. Clin Infect Dis. 2014;58(11):1540-8.
Fitch MT, Manthey DE, McGinnis HD, et al. A skin abscess model for teaching incision and drainage procedures. BMC Med Ed 2008;8:38. https://bmcmededuc.biomedcentral.com/articles/10.1186/1472-6920-8-38. Published July 3, 2008. Accessed December 27, 2017.
Flanagan, Morgan. Wound healing and skin integrity: principles and practice. John Wiley & Sons, 2013.
Heiner JD. A new simulation model for skin abscess identification and management. Simul Healthc 2010;5(4):238-41.
Marra F, Patrick DM, Chong M, et al. Population-based study of the increased incidence of skin and soft tissue infections and associated antimicrobial use. Antimicrob Agents Chemother 2012;56(12):6243-6249.
Miller LG, Eisenberg DF, Liu H, et al. Incidence of skin and soft tissue infections in ambulatory and inpatient settings, 2005–2010. BMC Infect Dis 2015;15:362.
Qualls ML, Mooney MM, Camargo CA, et al. Emergency department visit rates for abscess versus other skin infections during the emergence of community-associated methicillin-resistant Staphylococcus aureus, 1997-2007. Clin Infect Dis 2012;55(1):103-5.
Warren T. Learning to learn: Simulators are easy, inexpensive to make. ACP Internist. https://acpinternist.org/archives/2010/10/waxman.htm. Published October 1, 2010. Accessed December 26, 2017.
Parnham, Peter. The immune system: fourth edition. Garland, 2014.
Schmitz GR, Bruner D, Pitotti R, et al. Randomized controlled trial of trimethoprim-sulfamethoxazole for uncomplicated skin abscesses in patients at risk for community-associated methicillin-resistant Stapylococcus aureus infection. Ann Emerg Med 2010;56(3):283-7.
Qualls ML, Mooney MM, Camargo CA, et al. Emergency department visit rates for abscess versus other skin infections during the emergence of community-associated methicillin-resistant Staphylococcus aureus, 1997-2007. Clin Infect Dis 2012;55(1):103-5.
Warren T. Learning to learn: Simulators are easy, inexpensive to make. ACP Internist. https://acpinternist.org/archives/2010/10/waxman.htm. Published October 1, 2010. Accessed December 26, 2017.

Leave a comment